Narbulut Easy Image Backup Installation Guide
#
Updated Date: 03/11/2025
Narbulut Easy Image Backup; It is a modern, secure and manageable solution that allows you to take fast and reversible image backups at the disk/volume level of your computers and servers. In this guide, we will walk you through the initial setup and basic initial configuration steps.
Scope: This document covers the installation and initial startup process only. For usage details and advanced scenarios, refer to the “Narbulut Easy Image Backup Getting Started Guide”.
- Sistem Gereksinimleri
- Downloading the Setup File
- Running the Setup File
- Initial Login and Configuration
- Post-Installation Screens
- Frequently Asked Questions (FAQ)
Sistem Gereksinimleri #
Before starting the installation, make sure your device meets the following minimum requirements:
Component Requirement:
Operating System: Windows 10, 11 or Windows Server 2016 and above (64-bit)
RAM: Minimum 4 GB, recommended 8 GB+
Disk Space: At least 1 GB free space
Internet Connection: Stable and constant connection
Powers: Run the installation as Administrator; Make sure the Windows VSS service is enabled.
⚠️ Warning: Antivirus/EDR software may slow down or block installation. If you experience problems, consider temporarily disabling these software.
Downloading the Setup File #
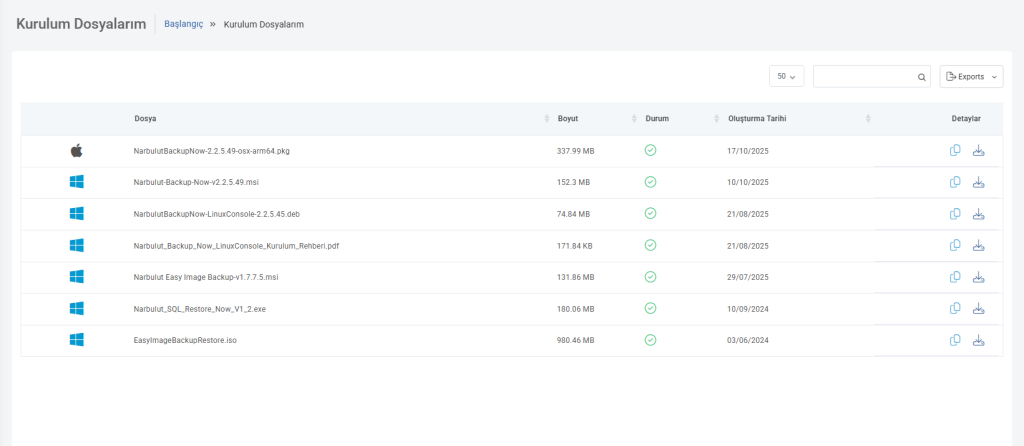
Log in to www.login.narbulut.com with your user information.
- Click on the My Installation Files tab in the left menu.
- Find the installation file suitable for your operating system.
- It can be downloaded by clicking the Download button to the right of the file, or you can copy the link to your clipboard to use in another environment with the Copy Download Link option.
💡 Recommendation: Reboot the system after installation; Make sure services start in the background without errors.
Running the Setup File #
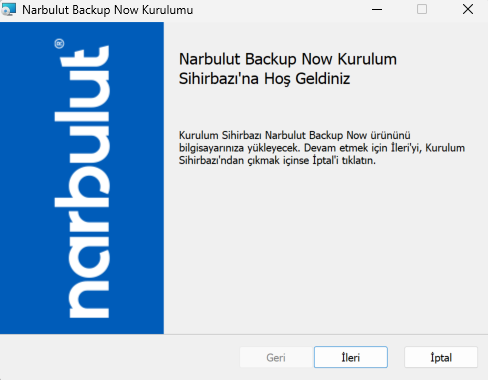
Right-click on the NarbulutEasyImageBackupSetup.exe file you downloaded and click Run as administrator.
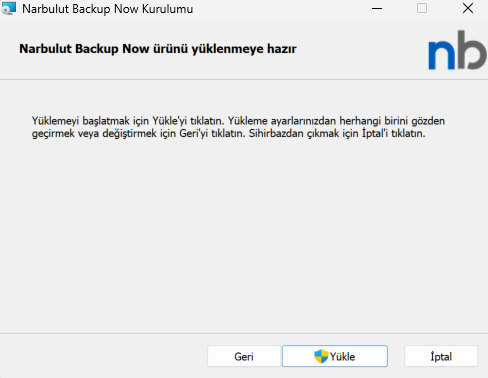
The first screen you see is titled Welcome to Installation. Continue from here by clicking the “Next” button. Then the License Agreement screen opens. Read the Narbulut License Terms and tick the “I Accept” box. Click the “Install” button to continue the installation. The installation process may take several minutes. When the installation is completed, the following option will appear on the screen:
Run Narbulut Easy Image Backup interface
When this option is selected and you click the “Finish” button, the application will be launched automatically.
When the installation is completed, the first screen that opens is the Folder Management menu. Via this menu:
 Warning: Some software (e.g. antivirus) running on your system during installation may slow or block the installation. If you experience problems, consider temporarily disabling these software.
💡 Recommendation: Reboot the system after installation; Make sure services start in the background without errors.
Initial Login and Configuration #
After the installation is completed Narbulut Easy Image Backup When the application is launched for the first time, you will be greeted by the Login Screen.
Sign in by entering your email address and password. If you do not remember your password, you can send a reset e-mail with the Forgot My Password option. After logging in, the system checks whether it has been previously installed on your device:
- If this device has not been installed before, the system will automatically direct you to New Installation mode.
- If there is an existing configuration, the system will give you options such as “Continue” or “Reinstall”.
- If you don’t have an account, Sign Up for a free 30-day demo.
The Configuration Agent runs automatically on first startup and prepares the basic components. You will then be directed to the Dashboard screen.
Essential First Step – Create your first image backup with the Quickstart:
- Open the Quick Start menu.
- Select the disk/volume to back up from Source Selection.
- Select the Cloud / Hybrid / Local target from Target Selection.
- Run the task with Start Now or schedule it with the calendar icon.
⚙️ Term Explanation – Fresh Installation: It means that the application is installed for the first time and there is no backup configuration before.
When the installation is completed, the system starts the necessary services and directs you to the home screen.
Post-Installation Screens #
System Status Bar (top menu): Shows the overall application status in colors:
Green: It is working smoothly, general operations are continuing.
Yellow: Currently running; may stop soon (user action needed).
Red: Not working; Situation caused by Narbulut (e.g. planned maintenance).
Main menus and quick use after installation:
1) Dashboard: View running tasks, disk IO statistics, cloud/local quota, and periodic work graphs.
2) Quick Start: Quickly launch a predefined image backup task or customize it via Settings.
3) Tasks:
- +Create task with New: Select Cloud / Hybrid / Local target type, define source disk/volume and target.
- Schedule: Select Daily/Weekly/Monthly; Optionally enable Auto Shutdown.
- Method: Select Full / Incremental / Differential; Set a weekly Full Backup Day.
- Retention: Set number of backups or day-based retention type.
Advanced: Configure retry on error, cloud upload speed limit, number of local versions in hybrid scenarios, waiting before sending to cloud, read/compress performance, and notification settings.
Start/Stop, Passive/Active tasks; Manage Edit and Delete operations.
💡 Recommendation: Apply Full + Incremental strategy in the first week; Schedule a Full Backup one day per week, choosing the retention type based on your business continuity goals.
4) Restore:
Restore your backups to Disk or Volume destinations.
Use the Restore Backup (local domain) or Restore Backup from Cloud options (both active if Hybrid).
5) View Backups:
Use the filter bar, download backups from the cloud from the cloud icon and follow their status.
6) Storage Areas:
Define local/NAS/network shares with Add New Target, add them with Verify and Save.
Narbulut Storage Area (for those with a cloud license) comes by default and cannot be deleted.
7) Disk Klonlama / Volume Klonlama:
Select the source and destination and click the “Start” button, watch the process status from the progress bar.
Cloning overwrites the target; The remaining space is left unallocated.
8) Past Activities:
Review backup, restore and clone history; Access statistics by clicking on the boxes.
9) Tools:
Create Startup Disk: Select ISO, specify and create USB destination.
10) Ayarlar:
View user/license, quota and version information; Perform Logout/Change Password operations.
Bandwidth Settings: Set your download and upload speed limits.
Connection Test: Test Internet and Narbulut Cloud connections.
Frequently Asked Questions (FAQ) #
The installation file does not work, what should I do?
Run the file as Administrator. If antivirus/EDR is blocking, define exception or temporarily disable it.
I cannot log in to the application, why might it be?
Verify your credentials, correct your date-time settings, allow login.narbulut.com access on the network.
What settings should I make first?
With Quick Start, select the source disk/volume and Cloud/Hybrid/Local target and start the first image backup; then define scheduling and retention policies in the Tasks menu.
Lisans girmem gerekiyor mu?
No. Your license is automatically defined through the account you log in to.
What is a hybrid backup and why should I use it?
Takes backups to both cloud and local/NAS; Provides local copy for fast restore and cloud copy for disaster scenarios.
How should I choose GPT/MBR for restore?
If you are not sure, do not change the default setting; The application automatically selects the original type of the disk from which the backup is taken.
Support and Contact #
For technical support on installation, feel free to contact us:
📧 support@narbulut.com
🌐 www.narbulut.com
Was this page helpful?
👍 Yes 👎 No


