How to Backup Narbulut Object Storage Service (NOSS S3) with Veritas NetBackup?
Back up easily with Narbulut!
How to Backup Narbulut Object Storage Service (NOSS S3) with Veritas NetBackup?
What is Object Storage?
Object Storage is a storage architecture used in cloud computing that allows users to store large amounts of files and access these files from anywhere. The Object Storage storage method stores users’ files in buckets as objects, each with a unique key.
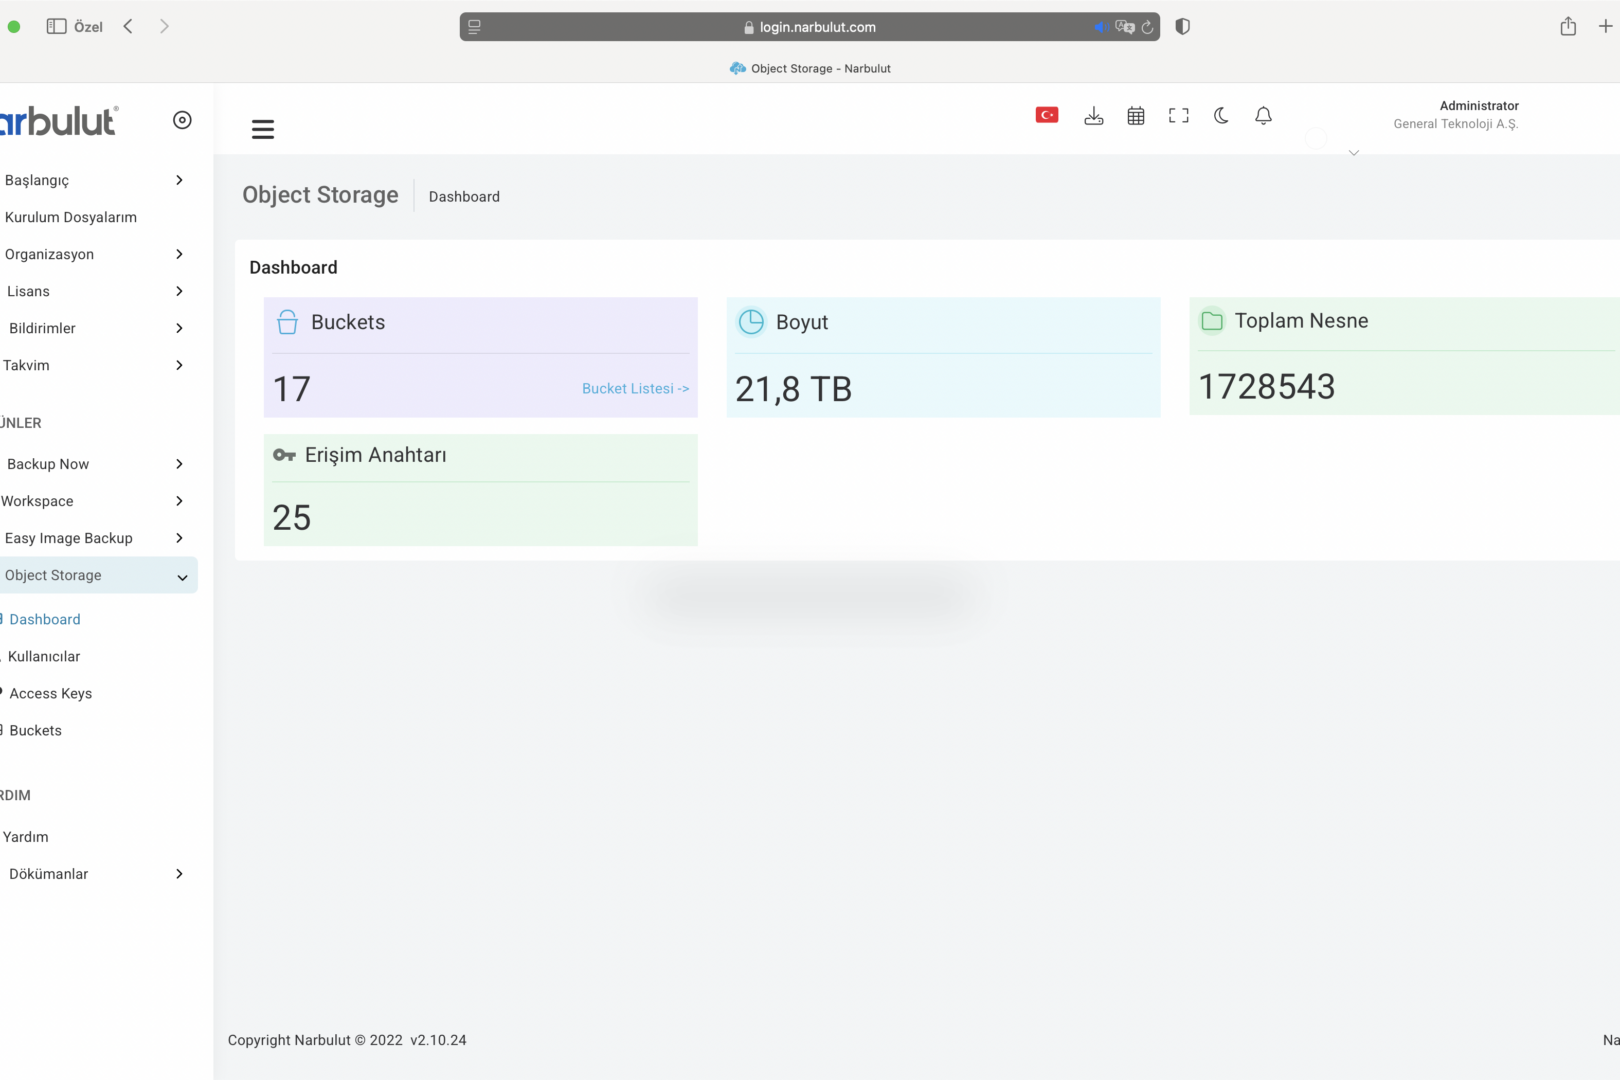
Narbulut’s Object Based Storage Service
You can store your data in Narbulut Object Storage Service (NOSS), Narbulut’s object-based storage infrastructure. This article; It will talk about how to use NOSS as storage in compatible Veritas NetBackup versions.
Using NOSS as Storage
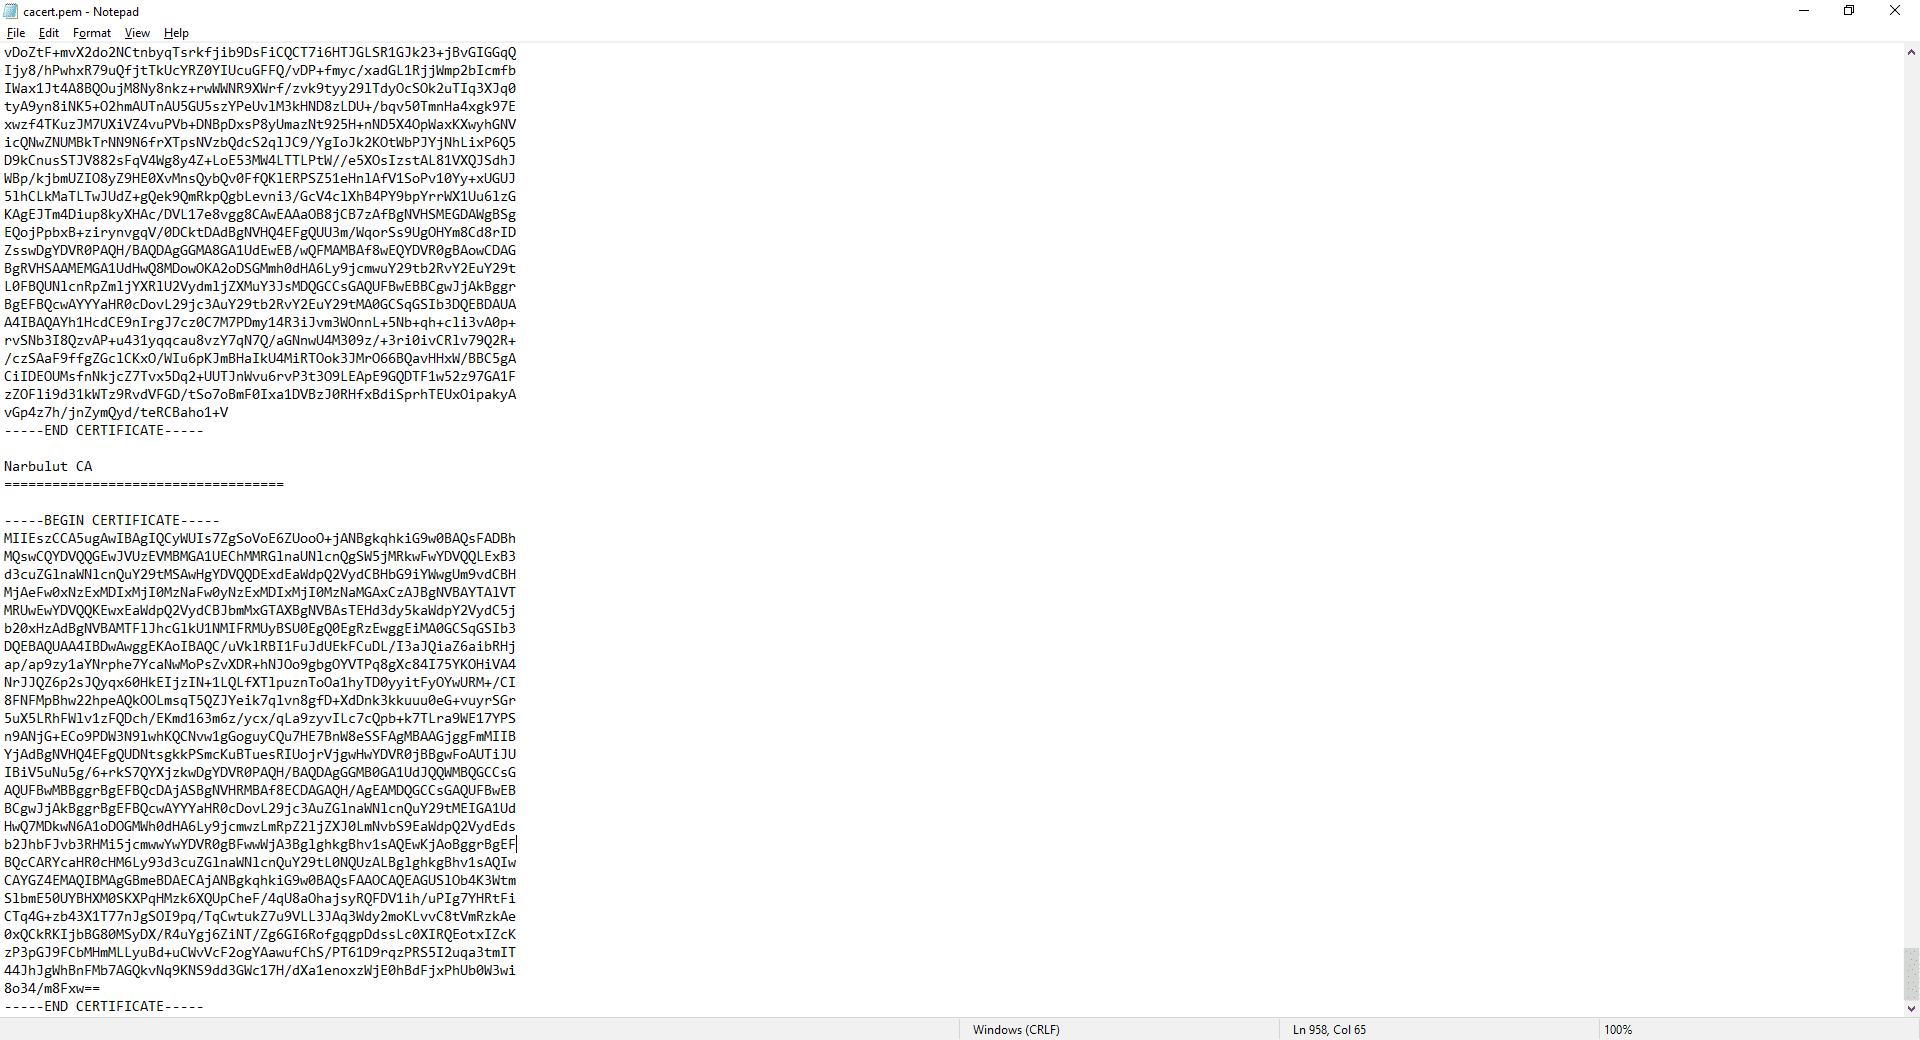
1. In order to back up to NOSS with NetBackup, NetBackup must be able to recognize and verify Narbulut’s certificate. For this reason, the root certificate that will recognize and authorize Narbulut’s certificate must be added to the NetBackup certificates file. [Veritas NetBackup installation path]/var/global/cloud/cacert.pem to file bu Add the certificate. (Open the certificate file with notepad to access the certificate content.)
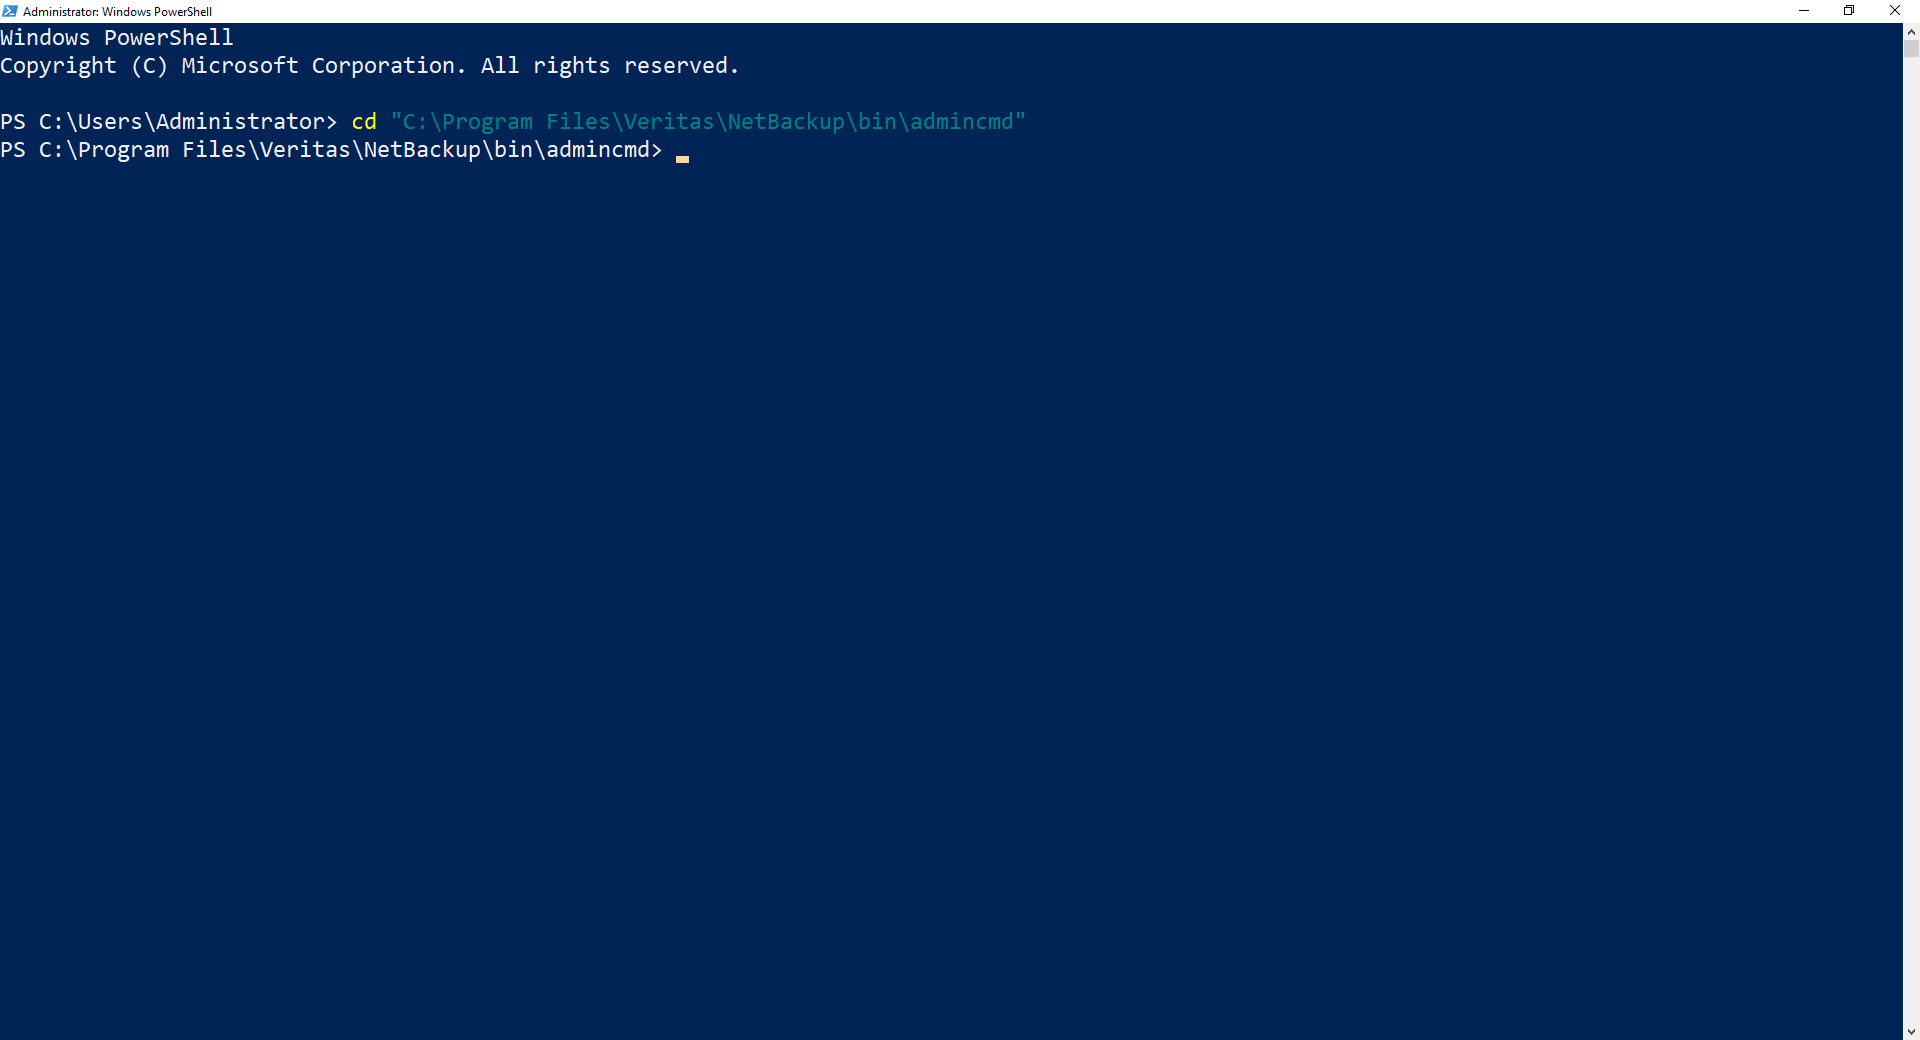
2. NOSS’u Cloud Storage Server Run Windows PowerShell as an administrator to start the identification process.

3. [Veritas NetBackup installation path]/bin/admincmd Go to the folder.
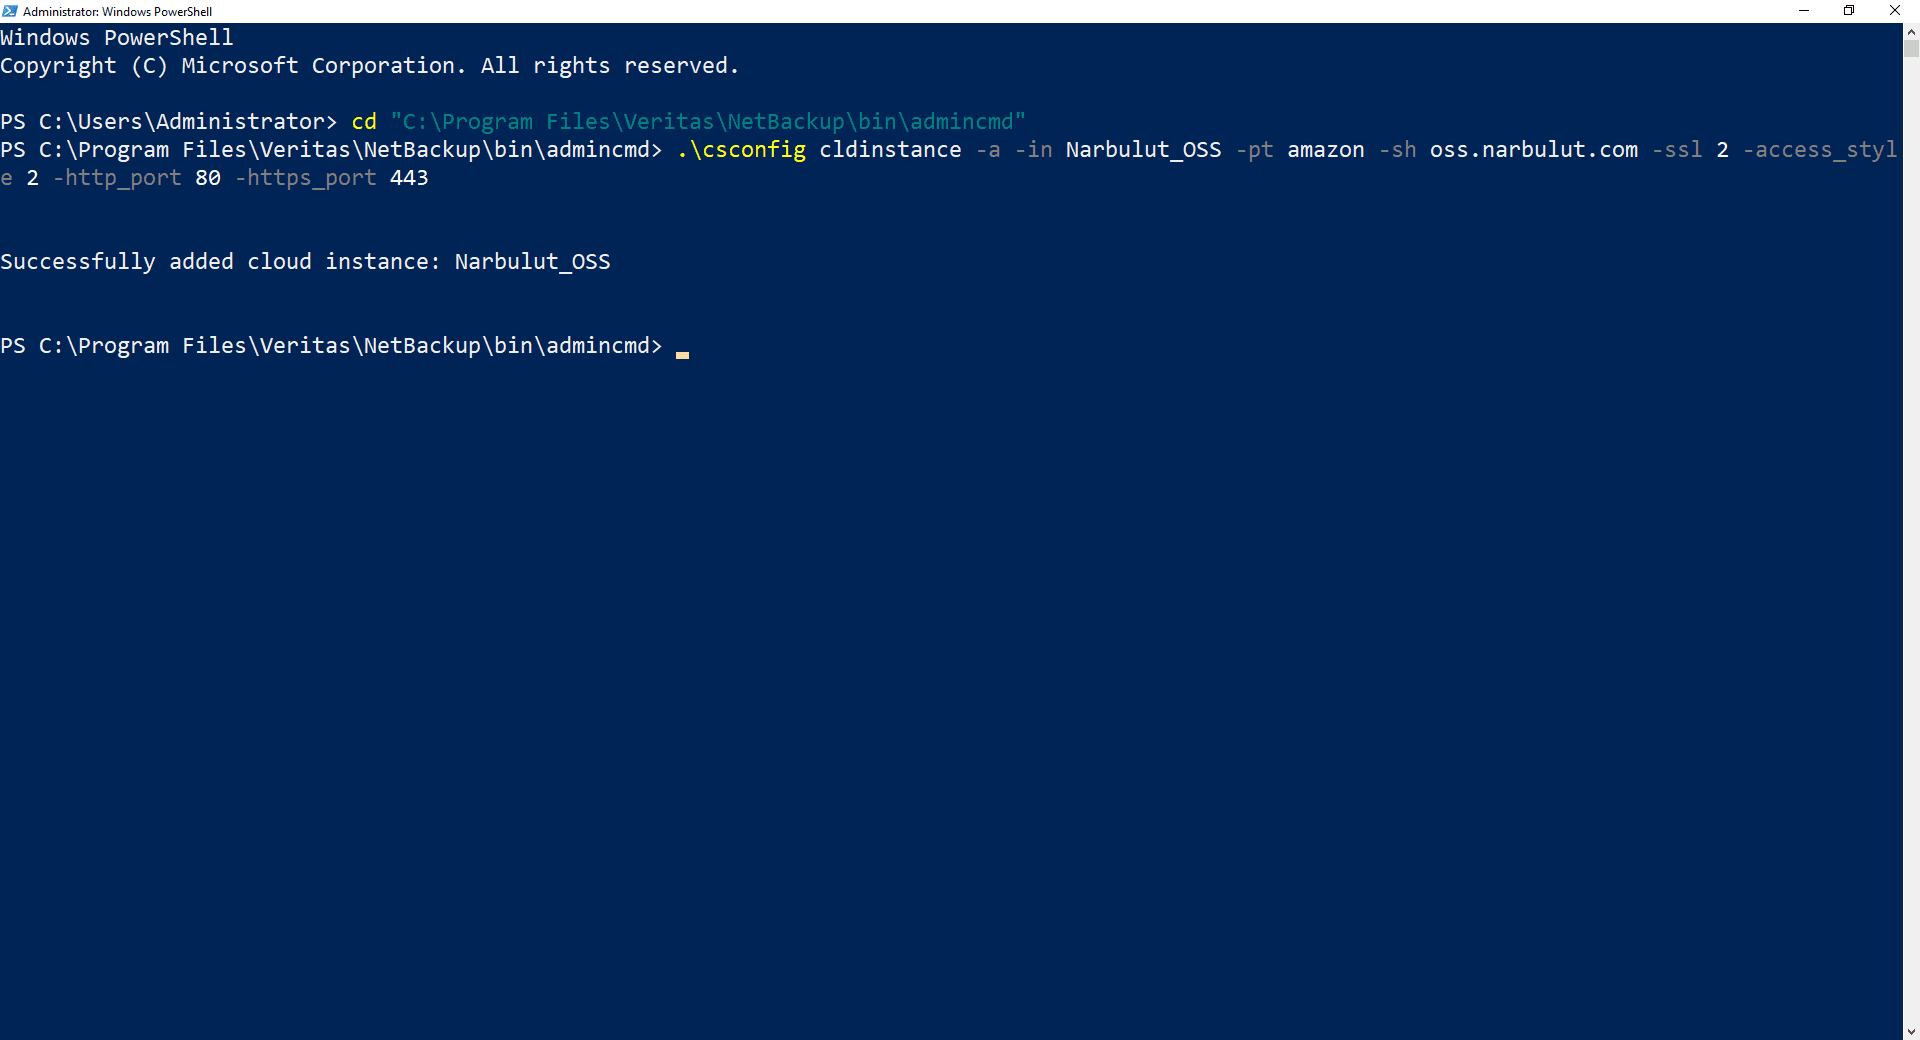
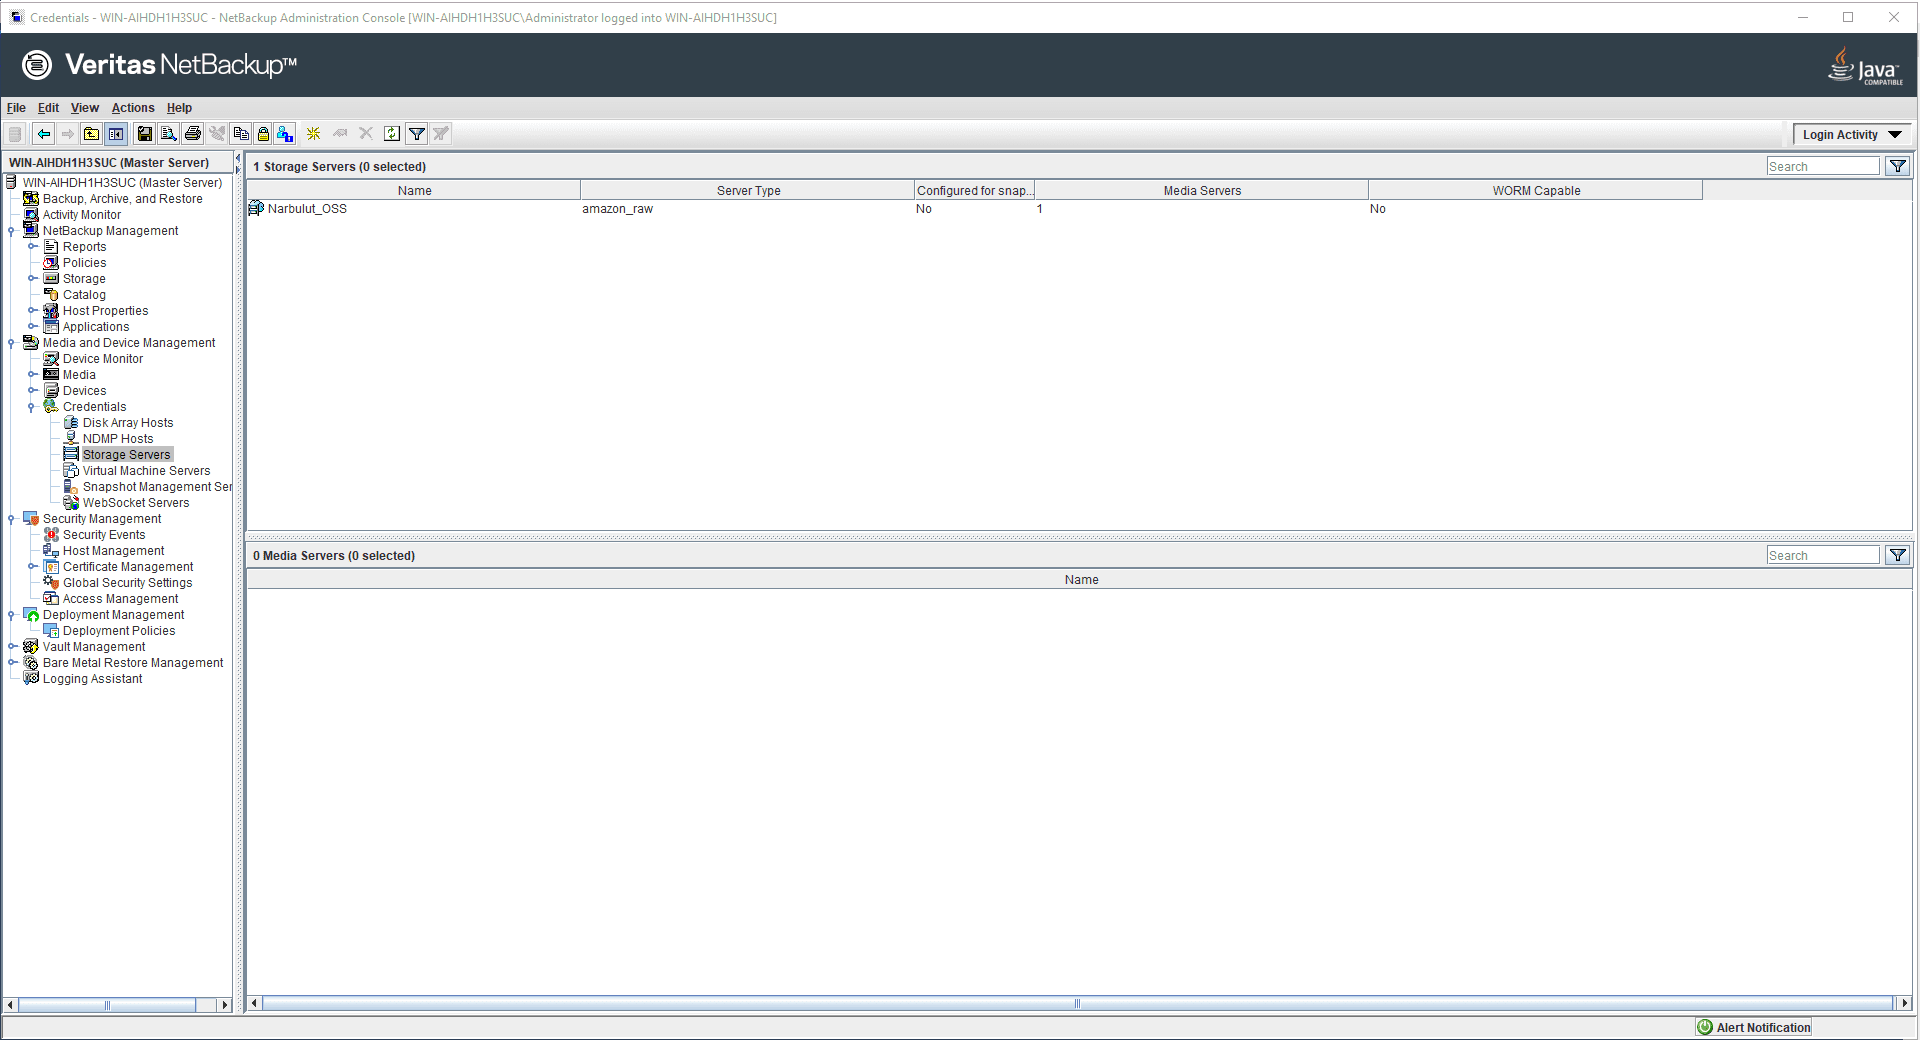
4. Copy NOSS to NetBackup by running the following command Cloud Storage Server Introduce it as.
.csconfig cldinstance -a -in Narbulut_OSS -pt amazon -sh oss.narbulut.com -ssl 2 -access_style 2 -http_port 80 -https_port 443
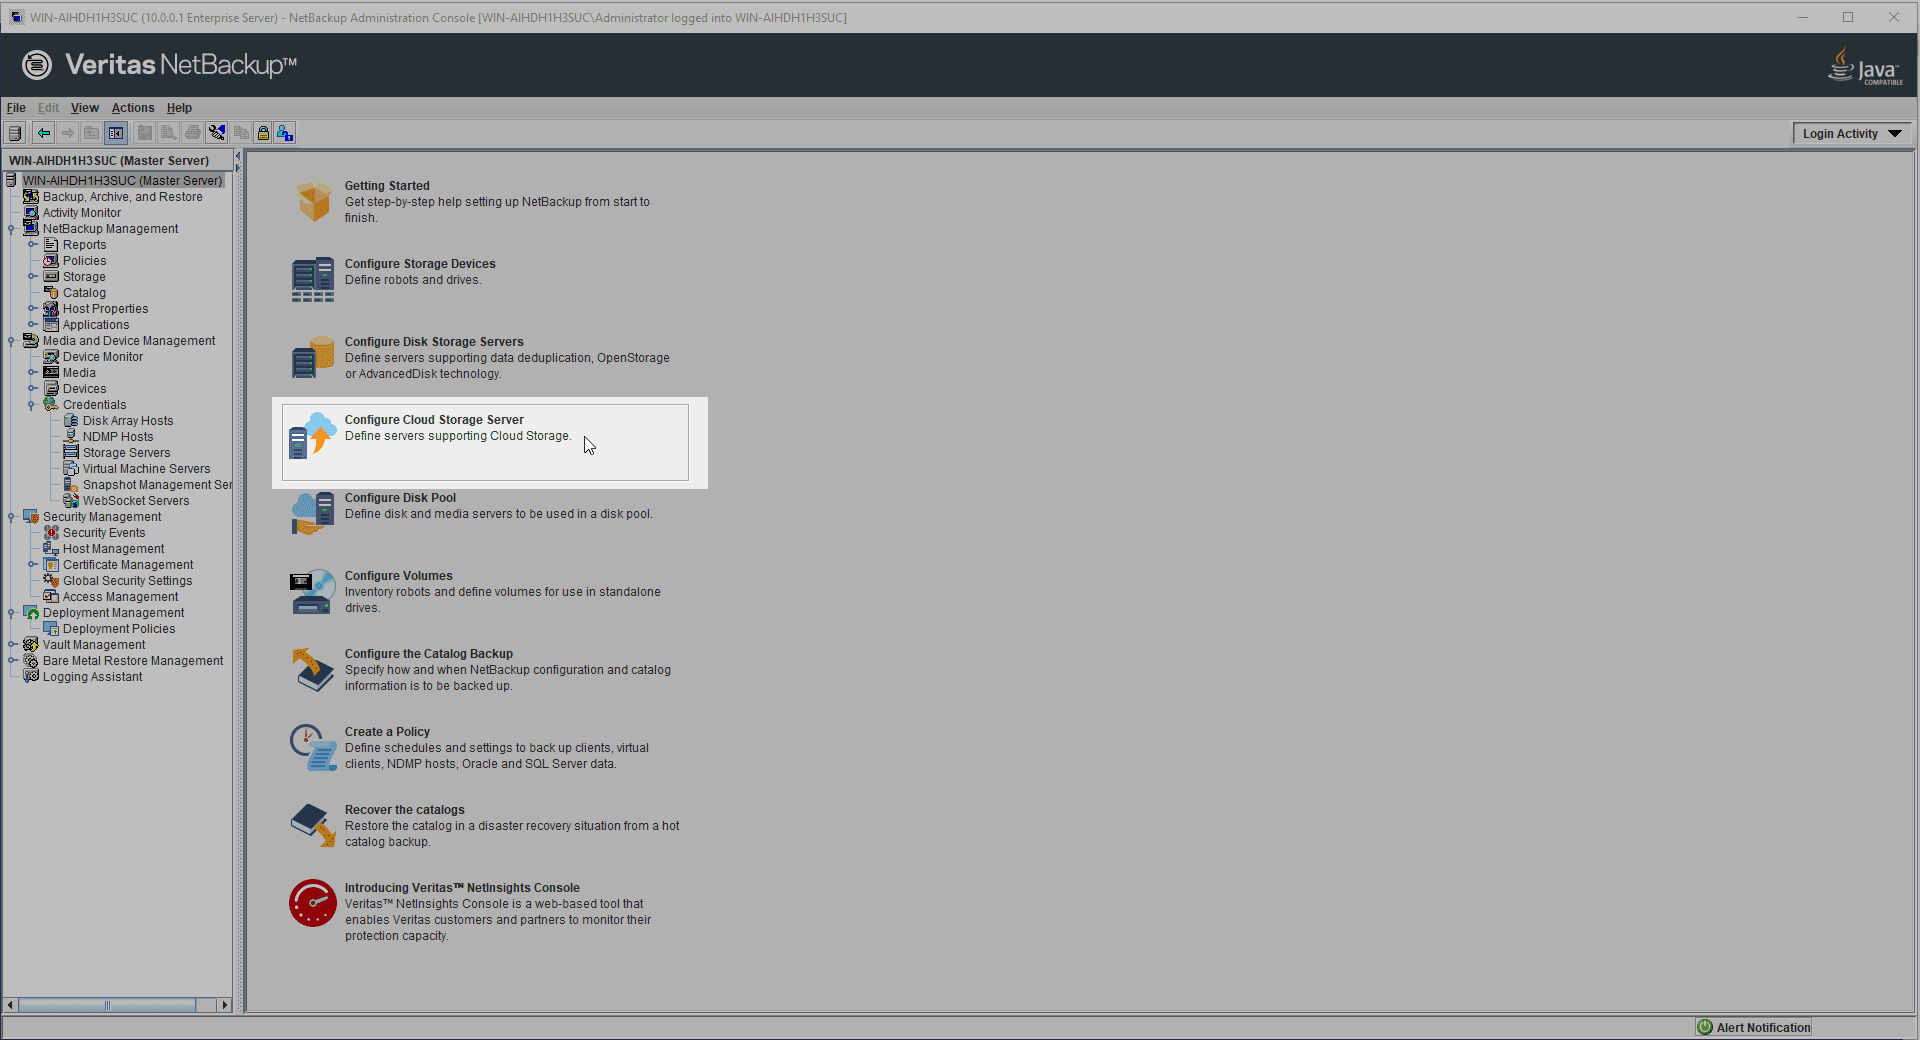
5. NetBackup Administration Console Log in to the application. Configure Cloud Storage Server Click to start configuring the cloud storage server.
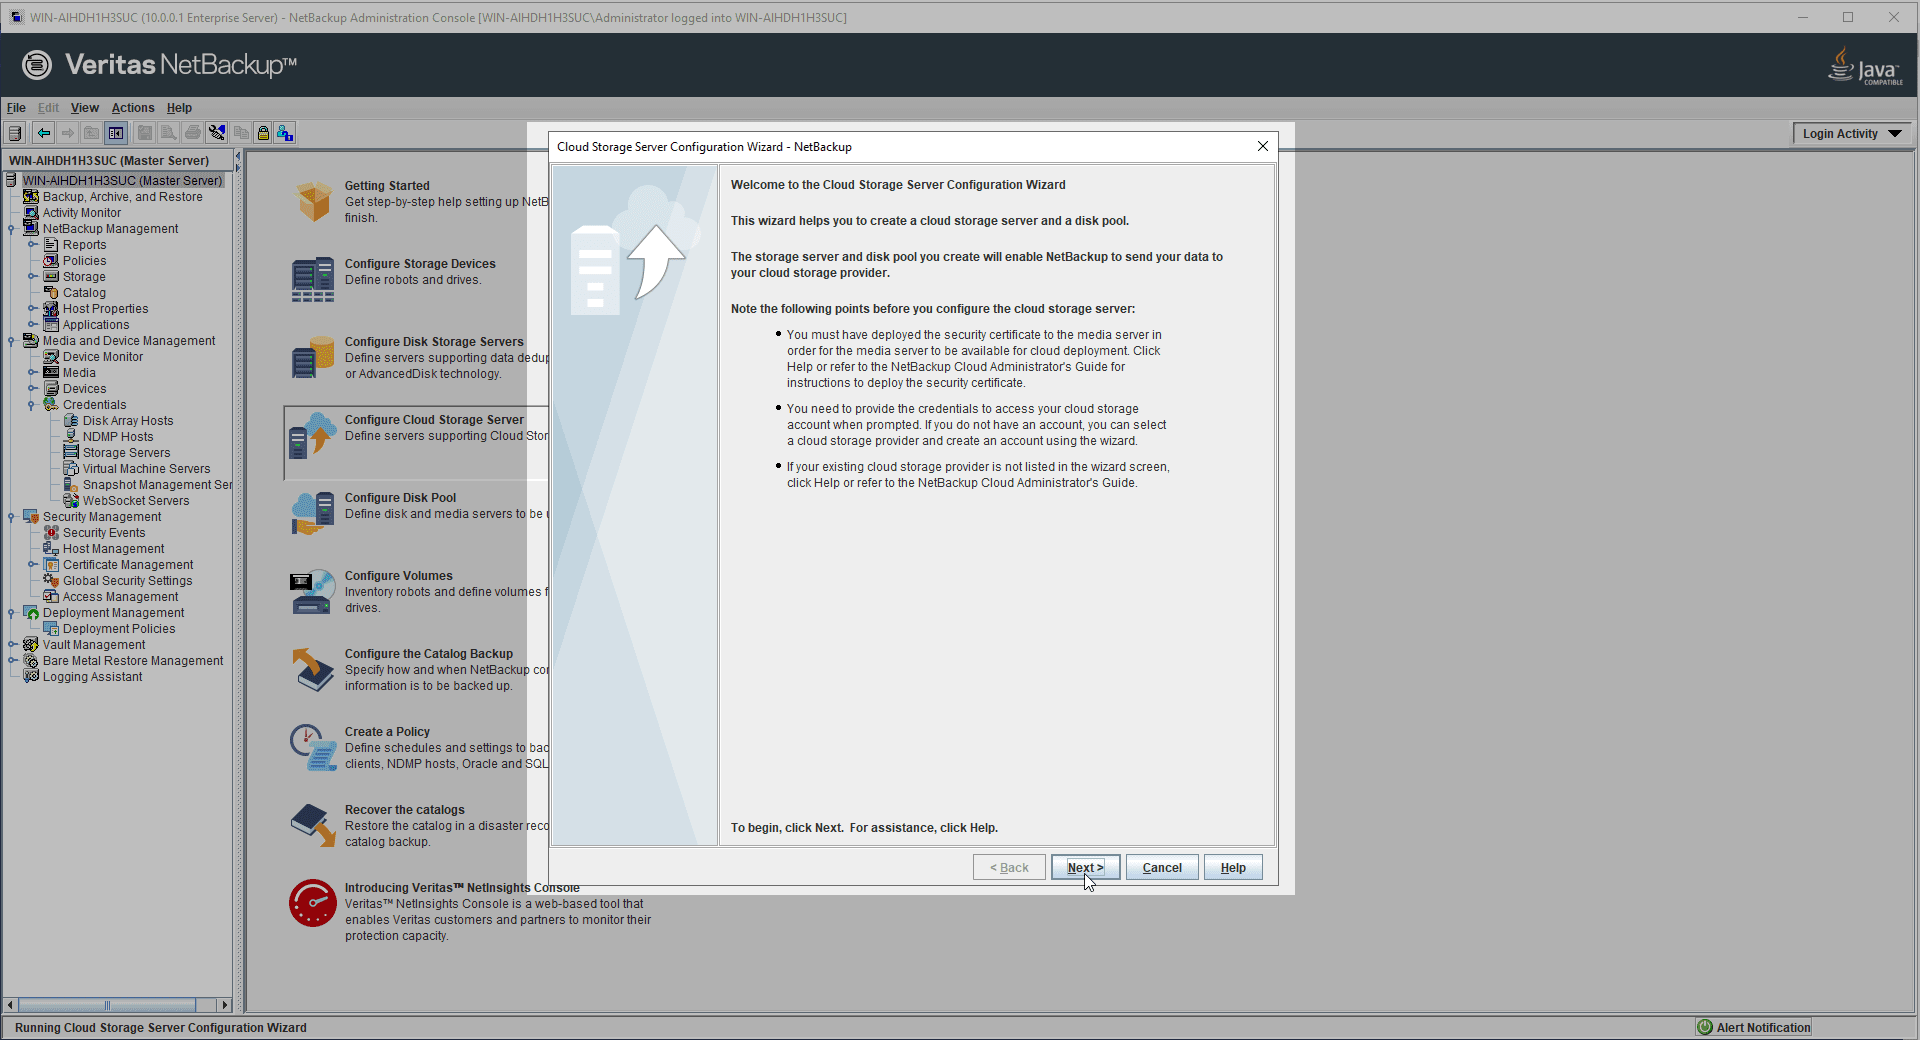
6. Read the necessary information regarding the configuration process.
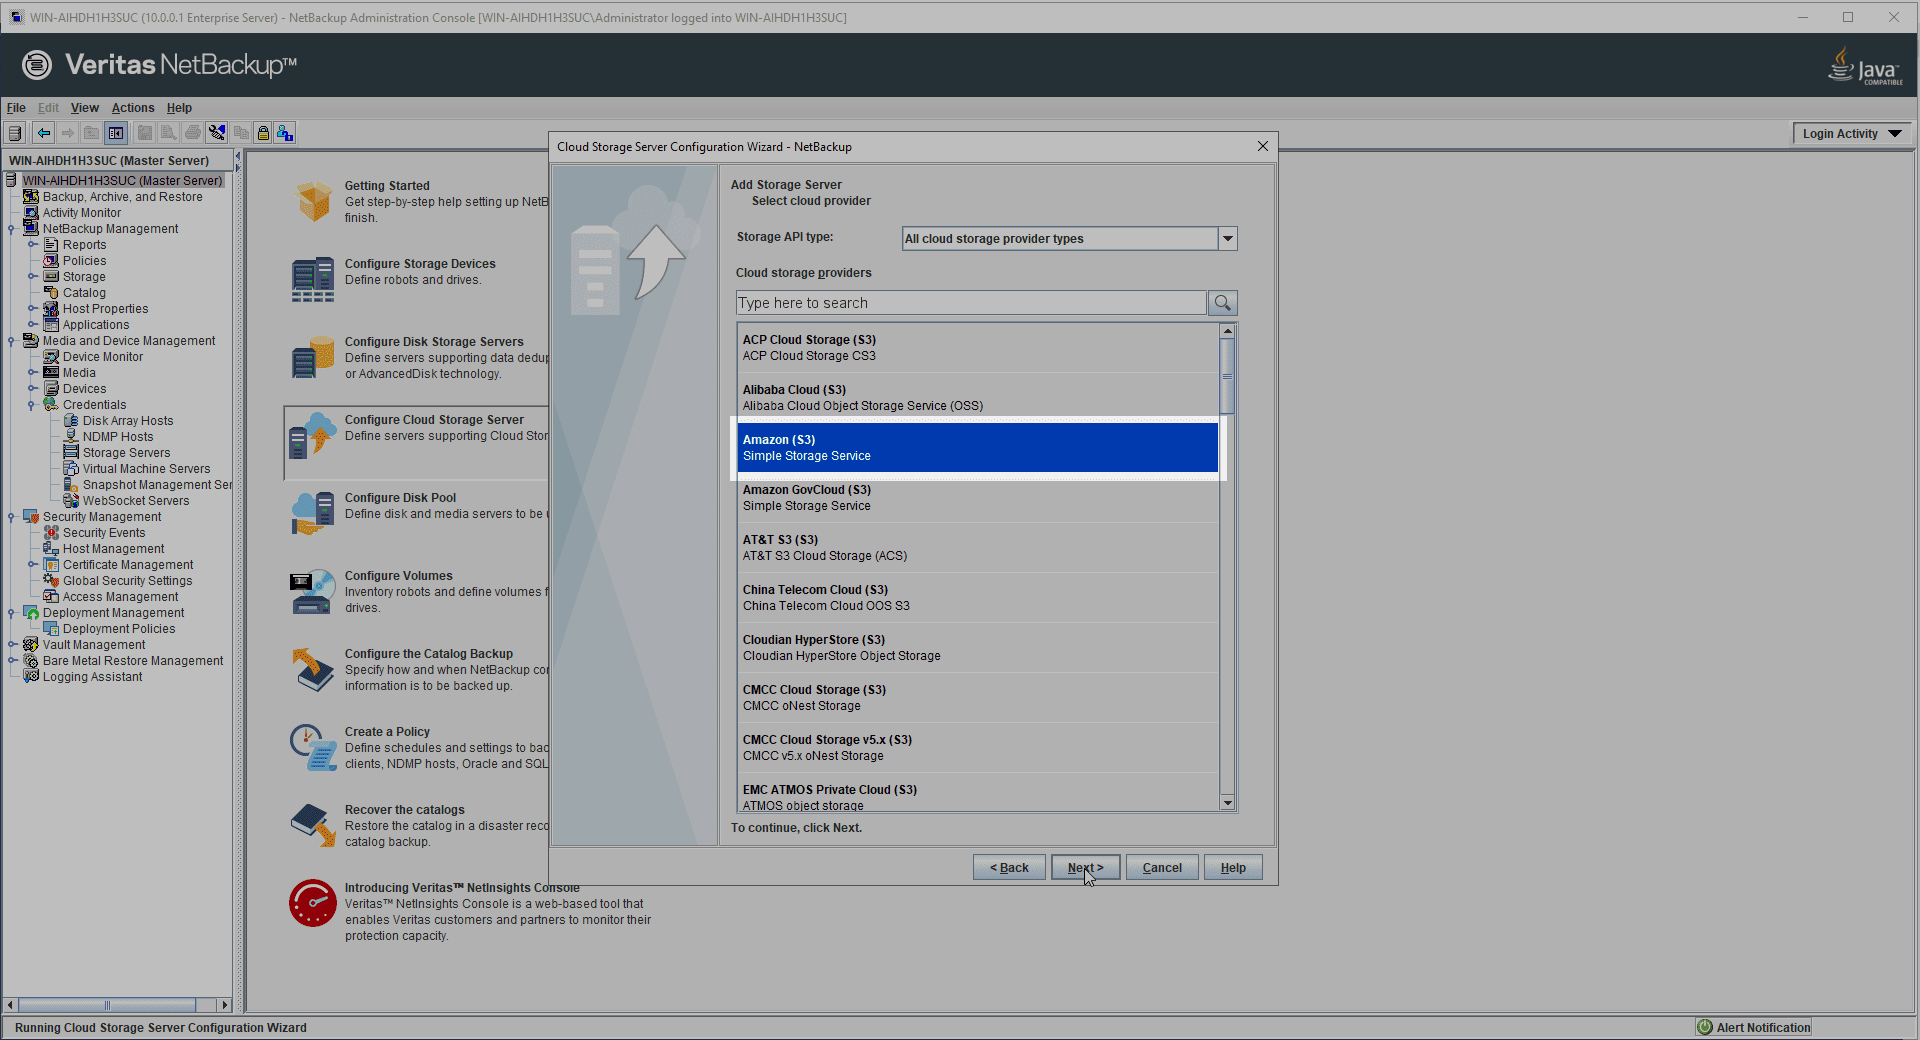
7. Cloud Storage Provider your choice Amazon (S3) Do it as.
8. Service host selection oss.narbulut.com Do it as. After making this choice Storage Server Name It should auto-fill, otherwise enter a name.
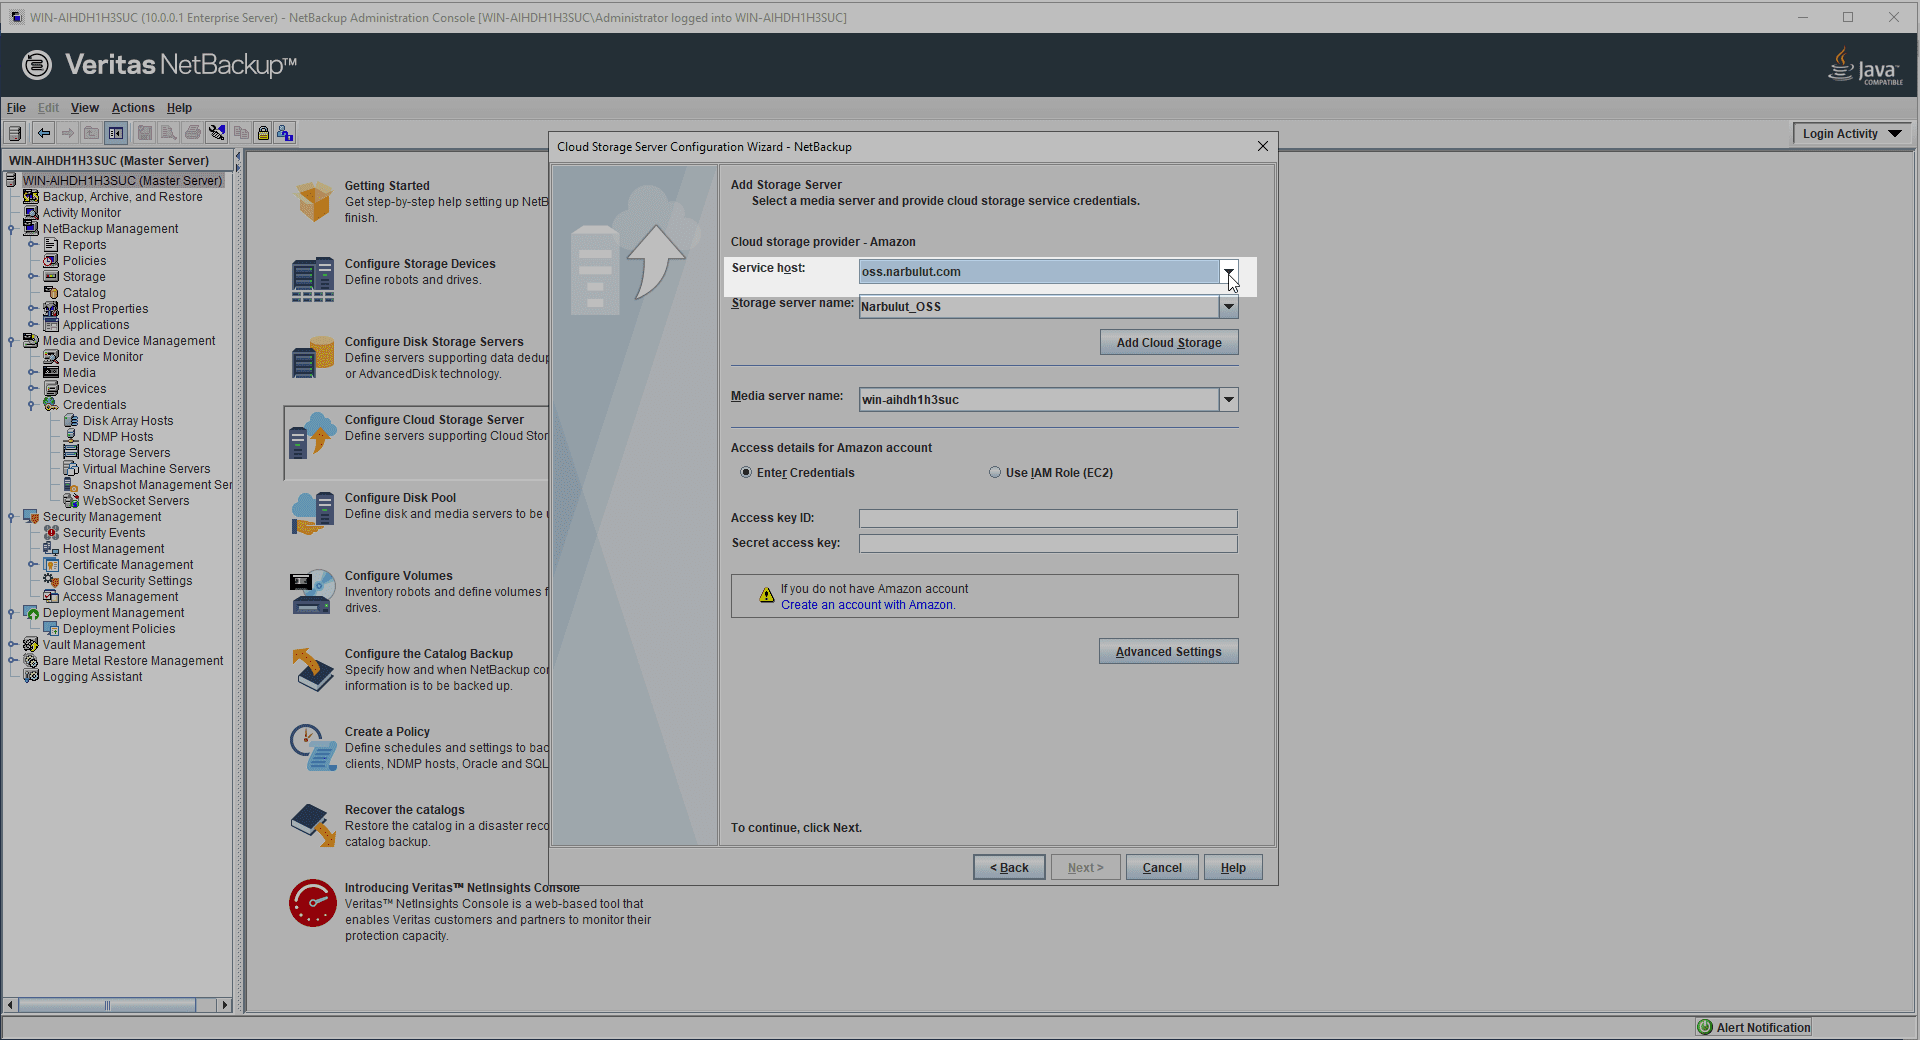
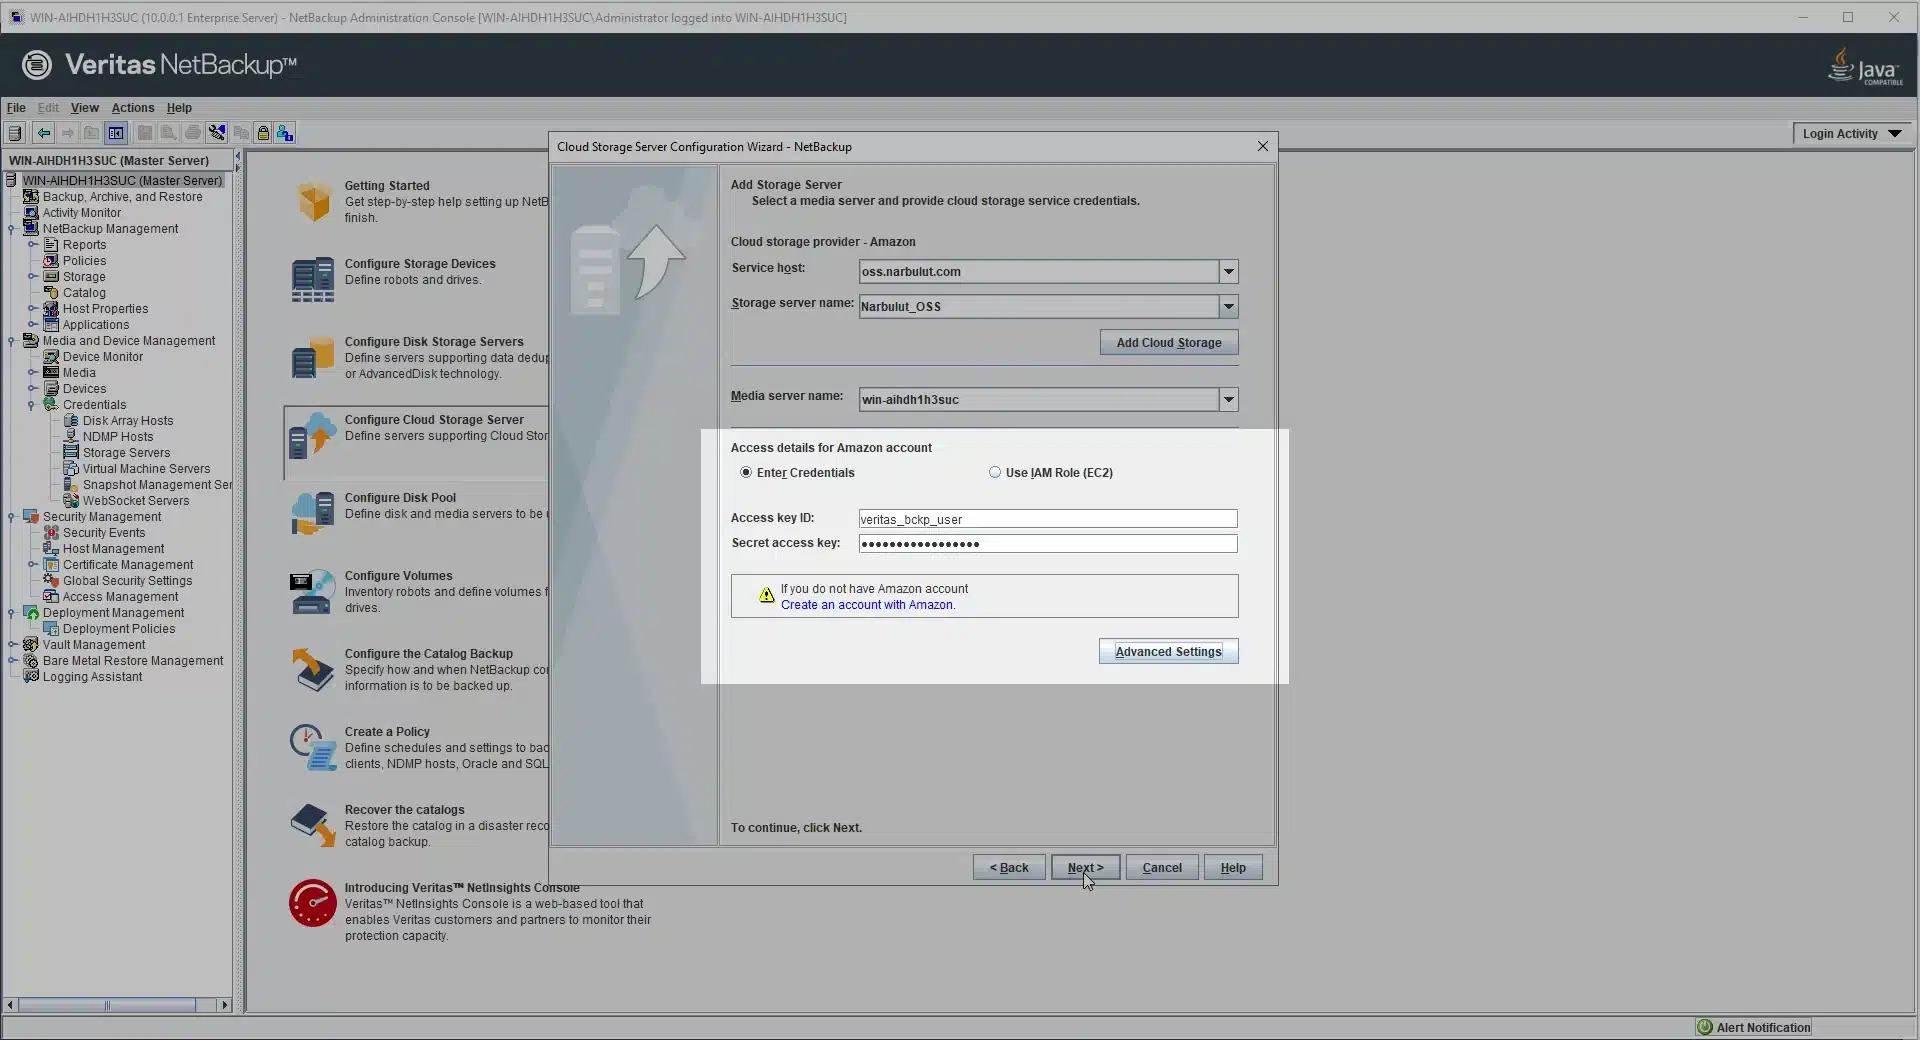
9. Access details Fill in the section with the information provided to you by Narbulut and complete this step.
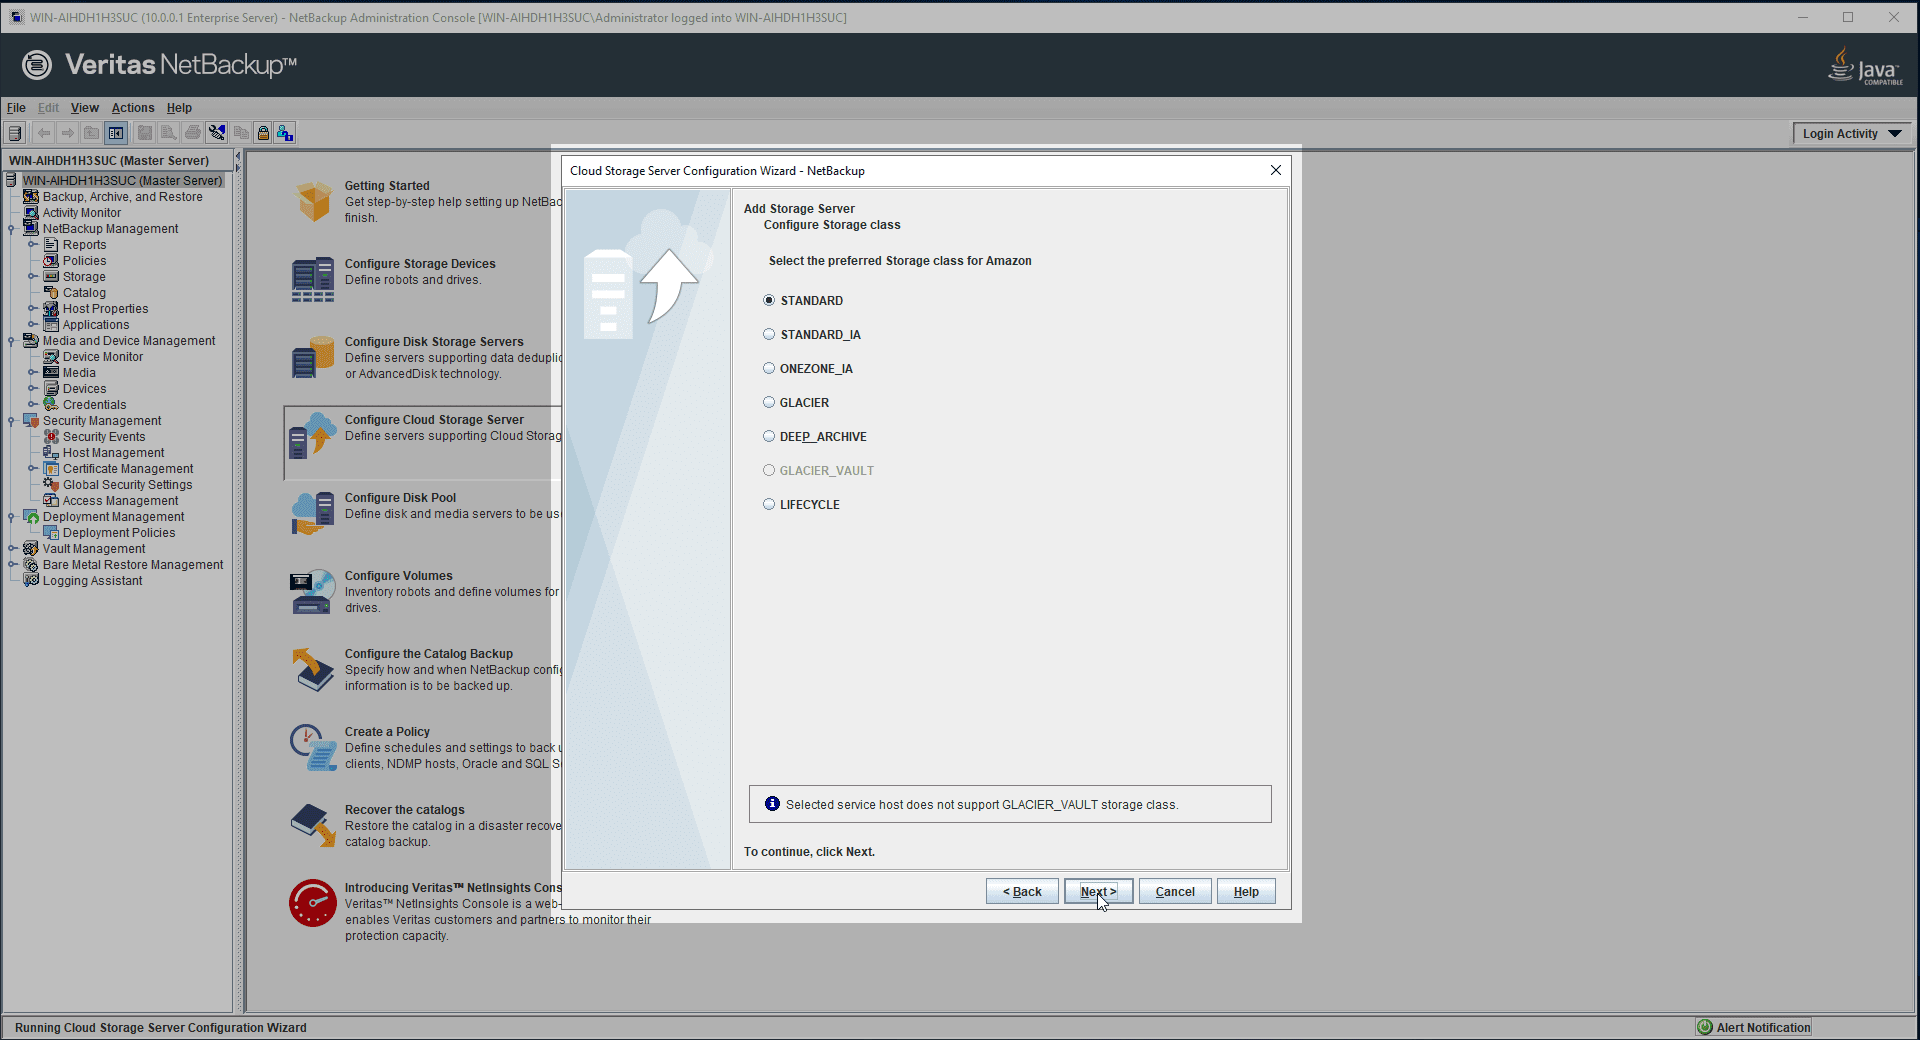
10. Storage Class your choice Standard Do it as.
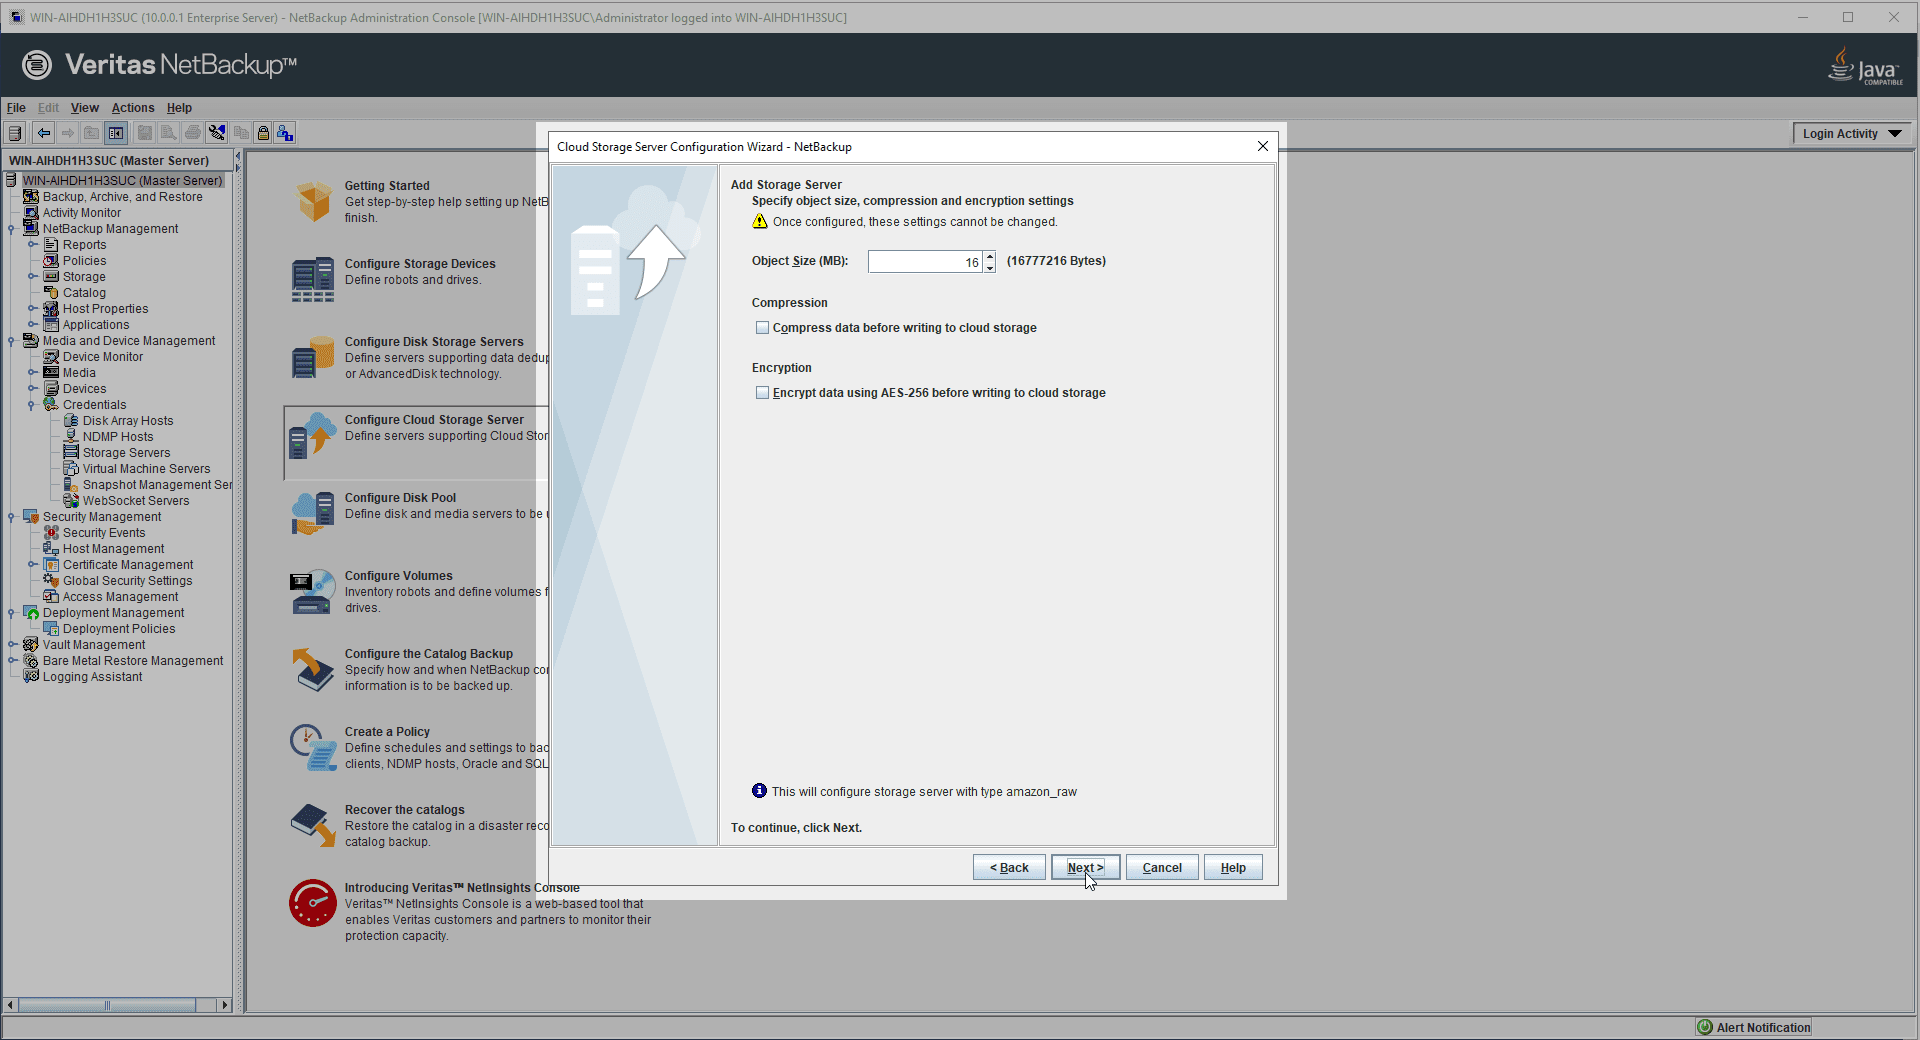
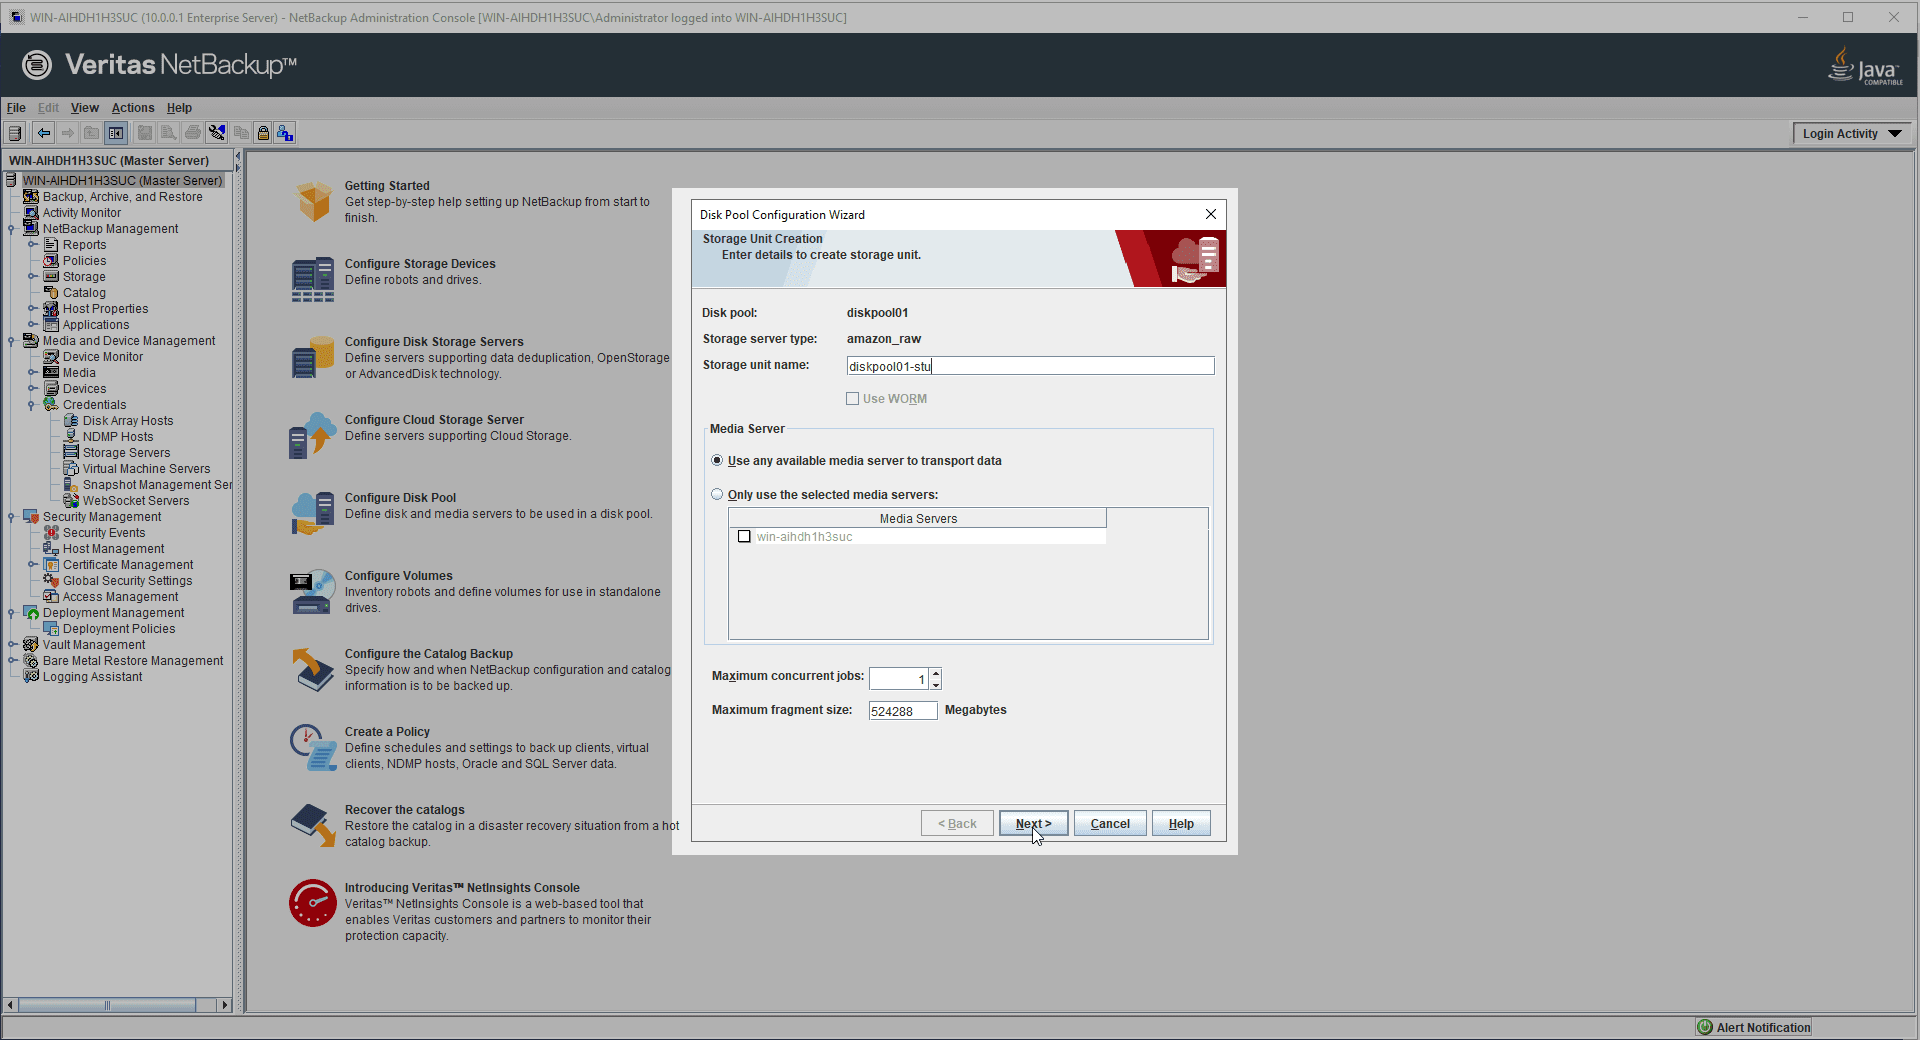
11. Adjust settings for object size, compression, and encryption.
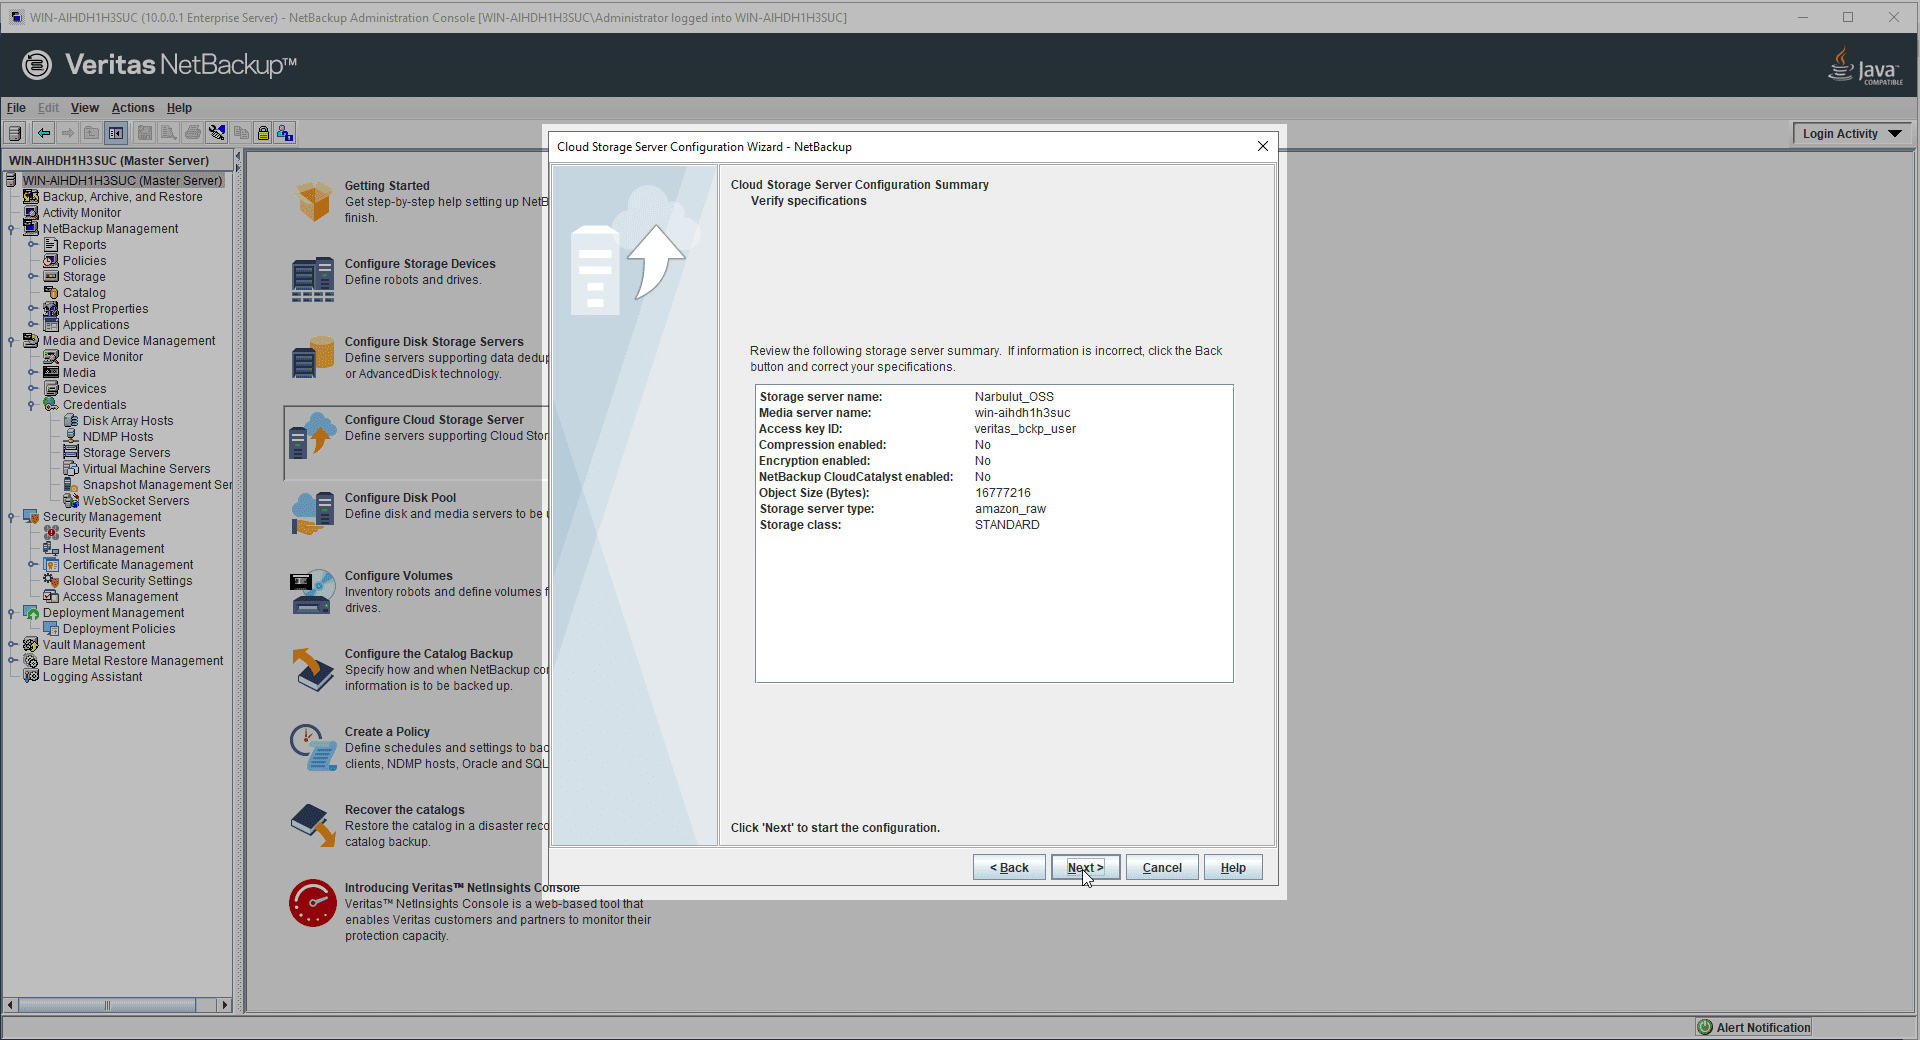
12. Review the cloud storage server configuration settings.
13. Wait for your configuration settings to be applied.
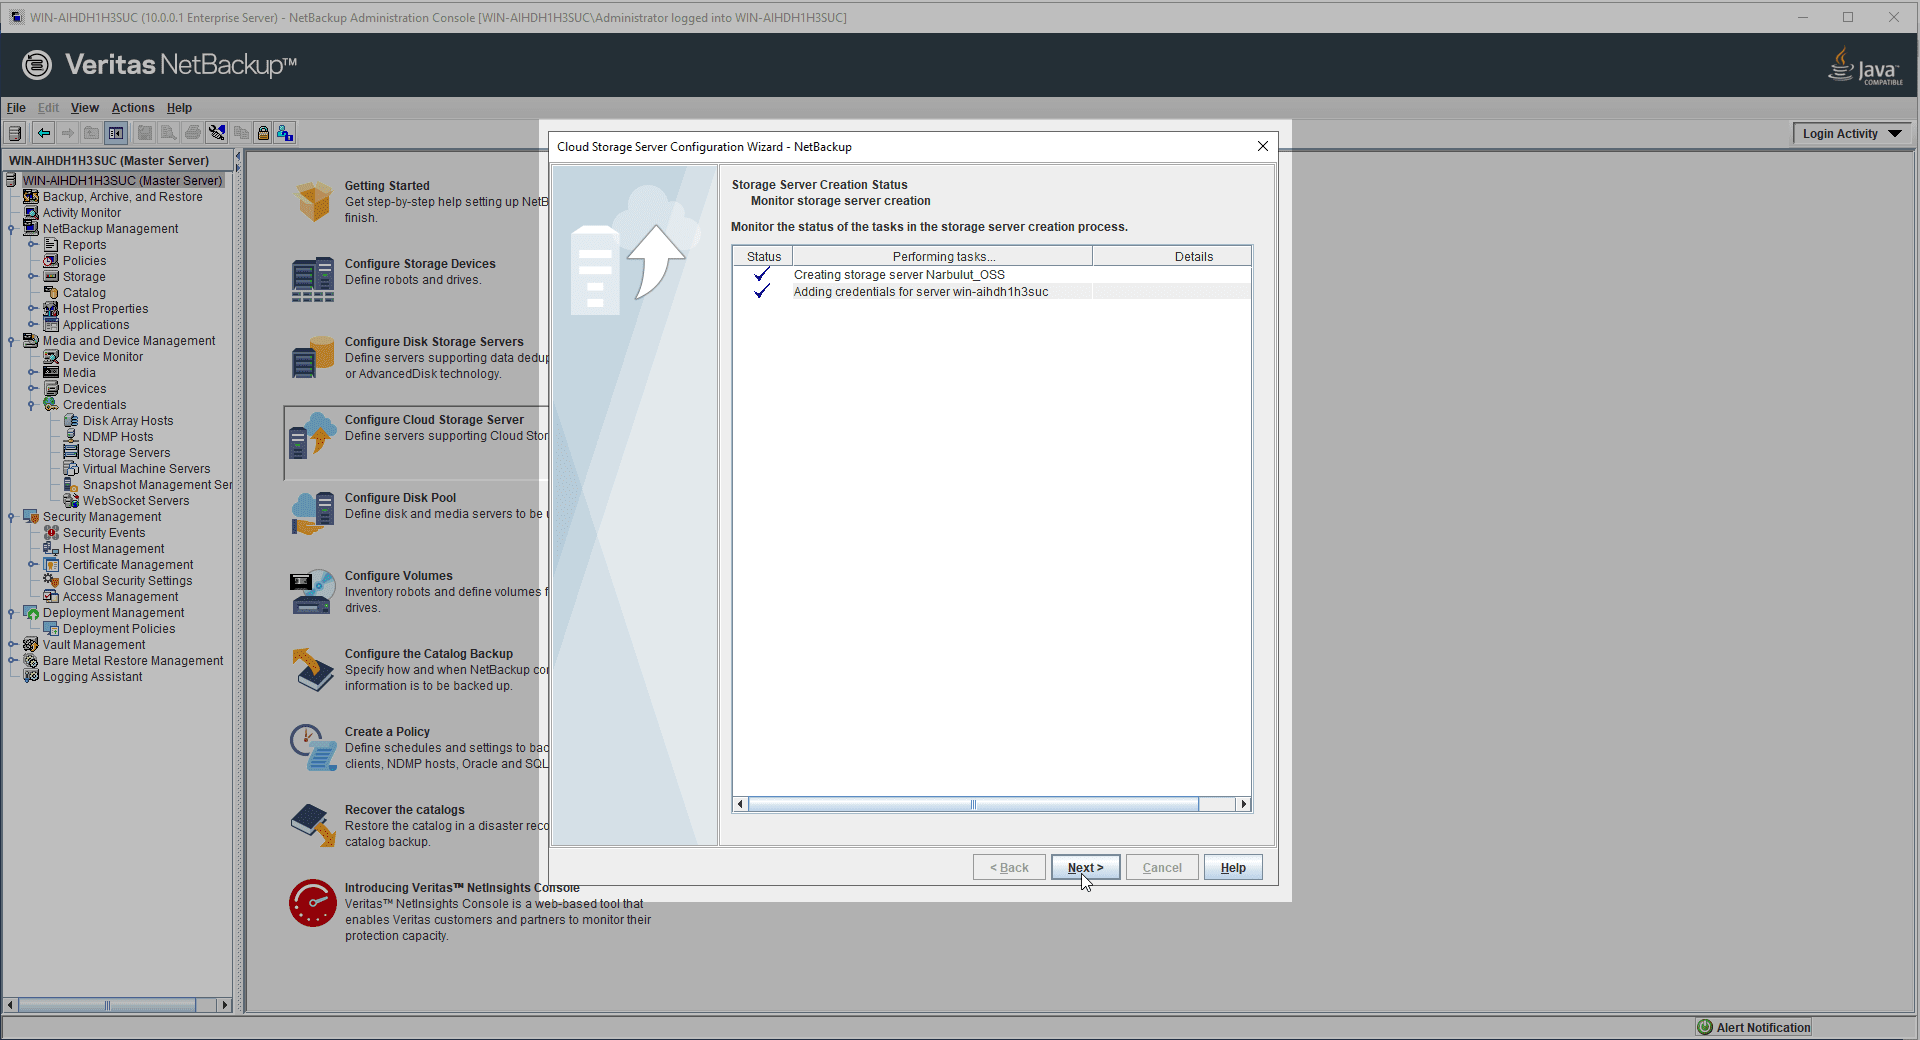
14. Cloud Storage Server configuration process is completed, Disk Pool If you want to configure it later or associate an existing Disk Pool with NOSS yourself, exit the wizard. To create a Disk Pool associated with NOSS, click the Next button to proceed to the Disk Pool configuration wizard.

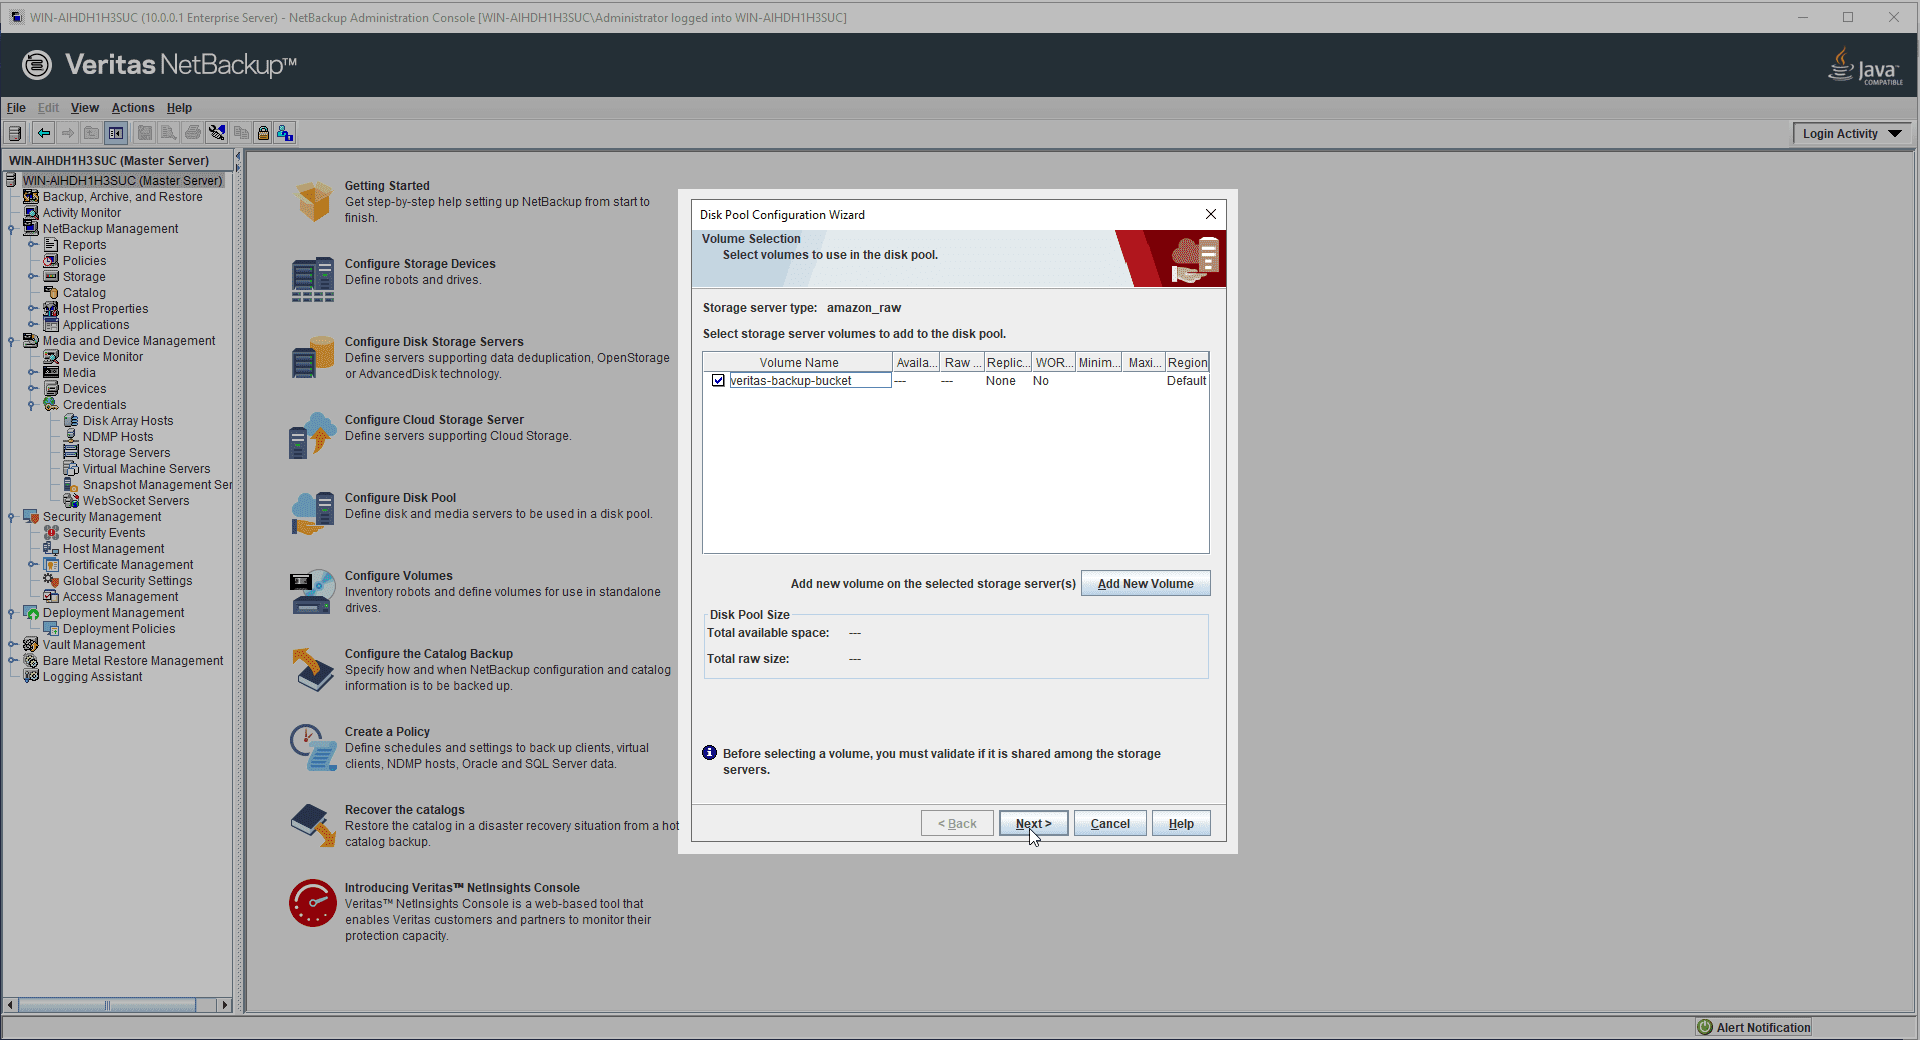
15. Bucket/Volume make your choice.
16. Give the disk pool a name. (Optional) Define I/O stream restriction.

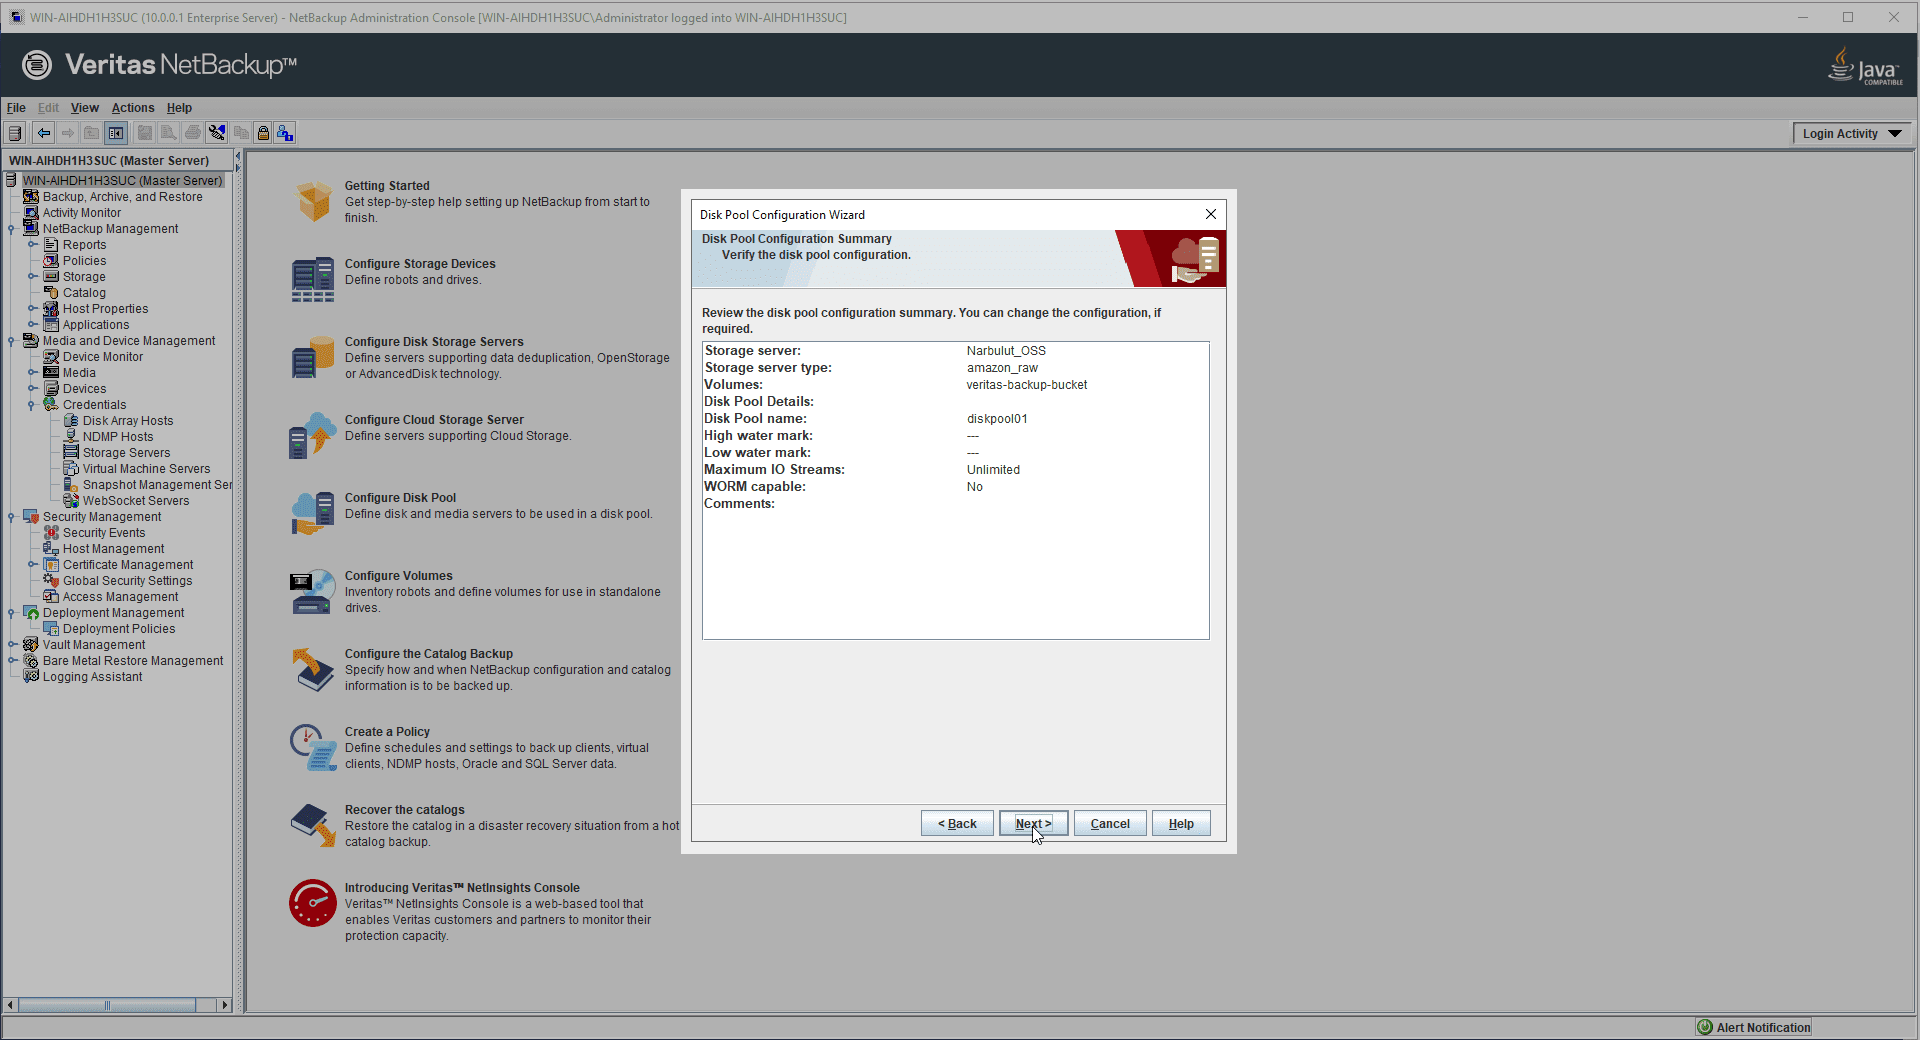
17. Verify the disk pool configuration summary.
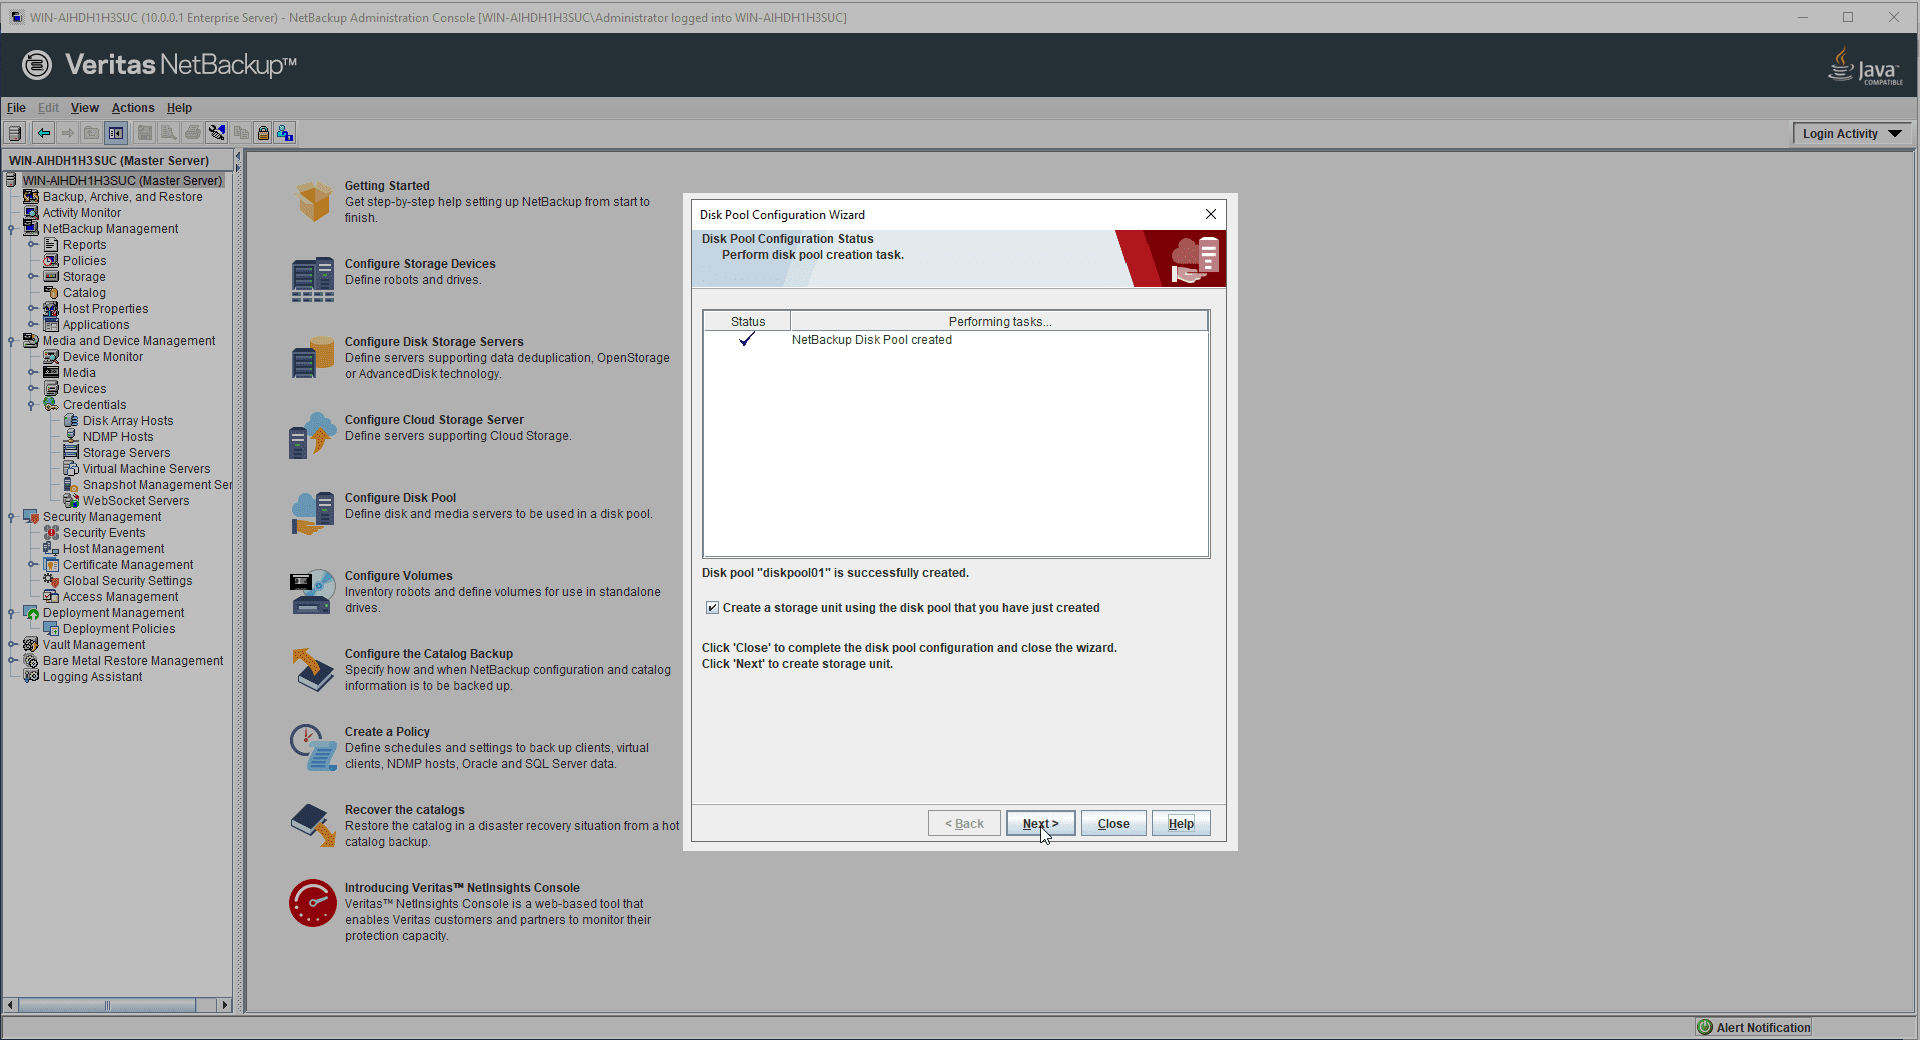
18. After your disk pool is created, you can exit the wizard if you want, and you can create a file connected to this disk pool. Storage Unit If you want to create one, leave the relevant checkbox ticked and continue following the wizard steps with the Next button.
19. Give the storage unit a name and configure some settings for the unit.
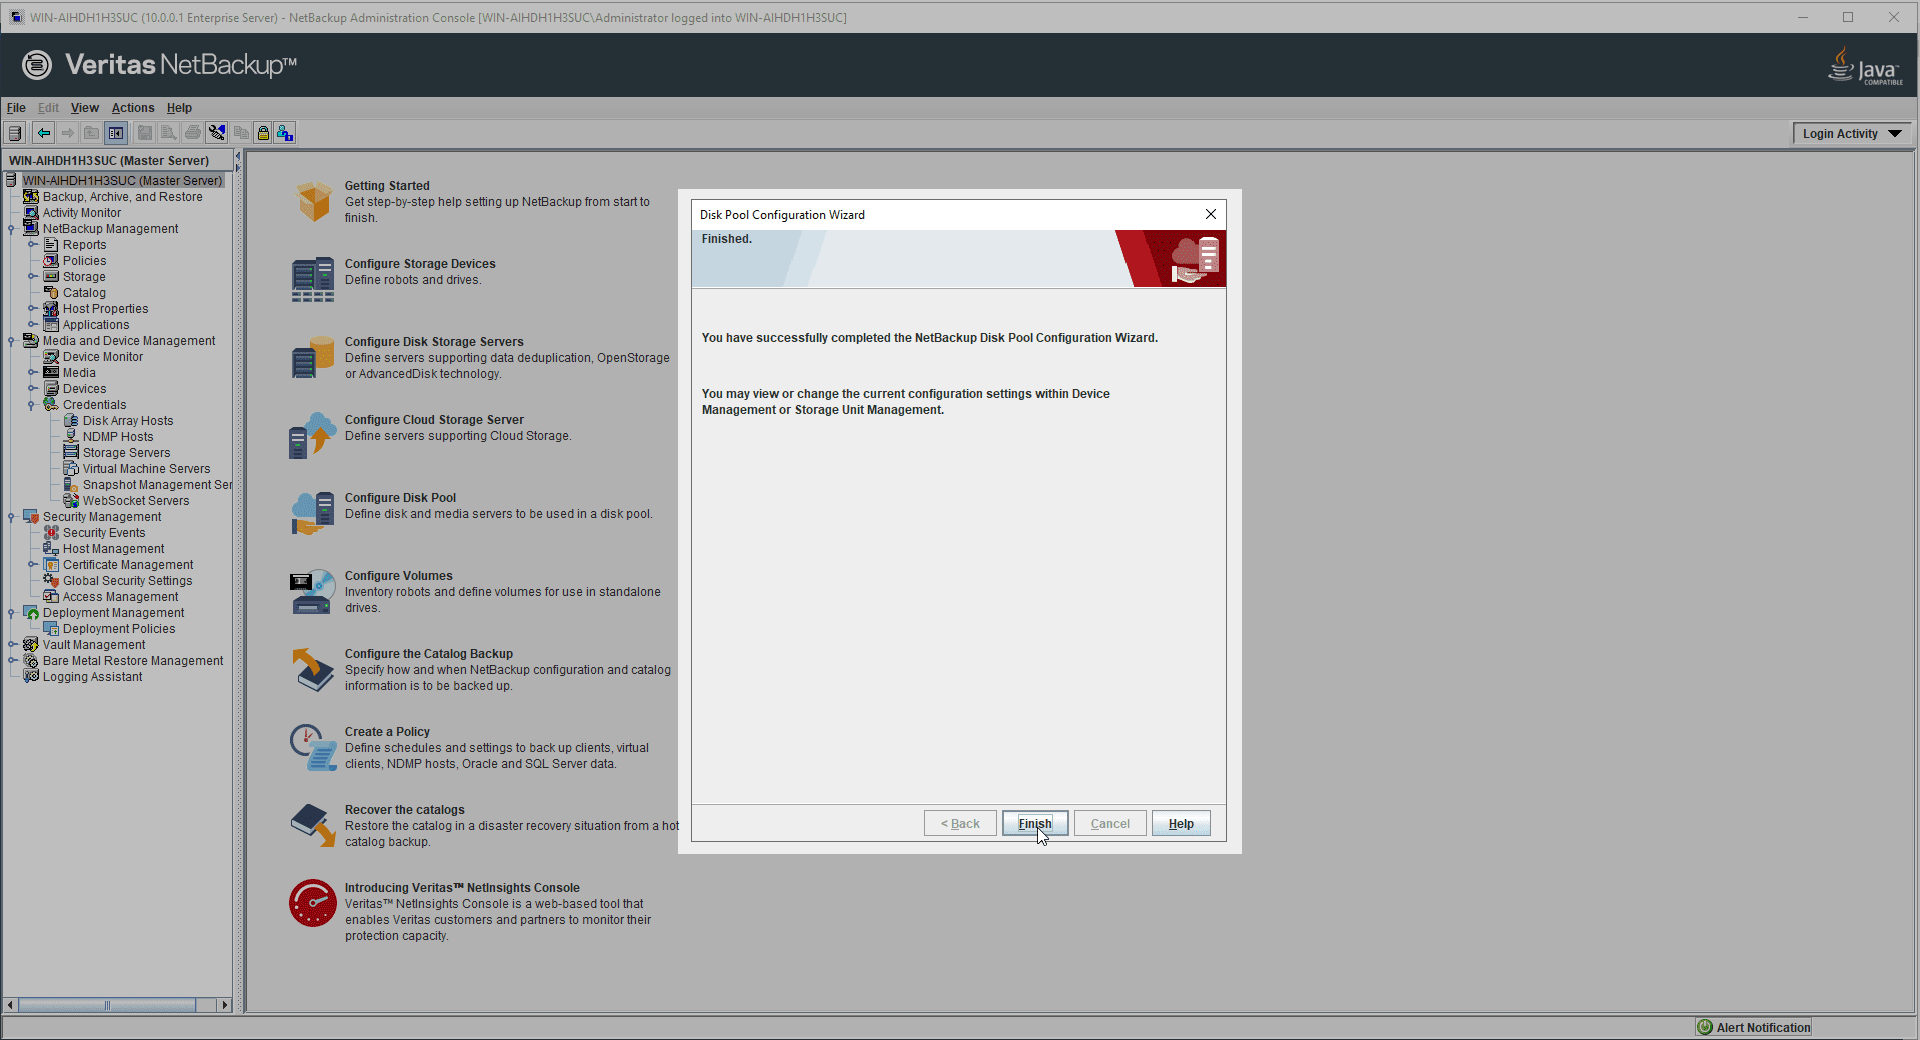
20. Your storage unit will be created with the settings you configured, exit the wizard.
You can associate the NOSS cloud storage server you have created with your disk pools, and these disk pools with your storage units. You can take your backups to NOSS by using the relevant storage units in your policies.
Pay for What You Need, Access from Anywhere
Narbulut Object Storage Service price calculator You can access special prices according to your data size by using You can access the data in NOSS from anywhere you want with the access address and information given to you by Narbulut.